BACKGROUNDS
There are two places in Dreamweaver to establish a background color or image. The best way is to redefine the <body> tag using a CSS rule and making choices in the background panel.
You can also use the Properties pane—click on the Page Properties button. Or, select Page Properties from the Modify menu.
The page properties dialog box can handle several aspects of your page's appearance, including link colors, the page title, font, text color and size, and whether you want to import a file to use as a tracing image.
Selecting a background color is easy enough—just choose it from the Background color palette or type in the hex number you want. Remember to start it with a #.
If you want a textured background, you must create a GIF or JPG file of your texture, and then select it by clicking the Browse button.
For an allover texture, create a small graphic in Photoshop or Fireworks and save it as a GIF or JPG. Depending on the nature of your texture, this file might be as small as 5 pixels X 5 pixels, or as large as 30 X 30 (which is still small).
Redefine the <body> tag in a new CSS rule and use the Background category to select the GIF or JPG as the background image. If you use Page Properties, click the Browse button to locate the image.
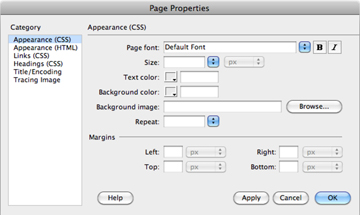
Whether you use the Page Properties from the Properties pane, or Modify > Page Properties, to establish a background color and/or image, you will be redefining the <body> tag as a CSS rule.
Depending on the type of image you're using, you need to decide how you want it to repeat; along the X axis (left to right), along the Y axis (top to bottom), tile (which creates an overall pattern), or none. Choosing none will place the image at the top left corner of the page, leaving blank area to the right and bottom beyond the image dimensions.
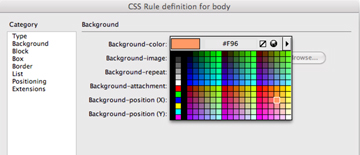
Redefine the <body> tag to specify a background color or image.
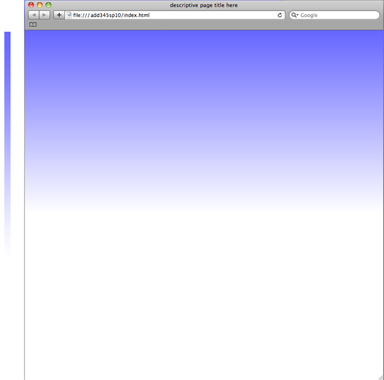
Create a gradient up and down by repeating a thin vertical stripe along the X axis for the Background property.
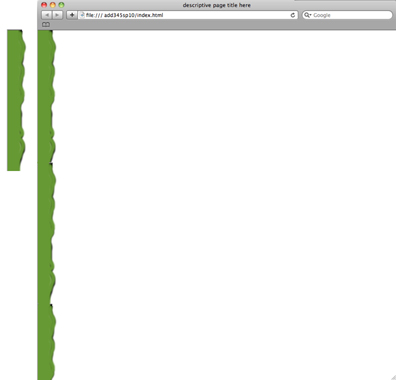
Create an edge graphic using a vertical strip and repeating along the Y axis.
If you want a background that creates a border along the left or right edge of your page, the shape of your GIF would be 720 pixels X 10 or so. Repeat it along the Y axis.
When the image above tiles along the Y axis, the stripe repeats along the edge and the blank area to the right creates space for text and images. You must remember to specify a margin that clears the edge as part of the <p> tag.
To create an interesting horizontal effect, you would create an image that was only 10 pixels wide, by at least 540 pixels high.
When it's repeated across your page along the X axis, the stripe or gradient fades away at the bottom. If you use two colors, rather than a color and white, then set the background color of the file to match the bottom color in the gradient.
If you don't want an image to repeat, choose no-repeat.
You can position the background image specifically in the background category by using the Background-position fields.
You can use specific measurements to position it X from the left and Y from the top, or you could choose to center it top to bottom, left to right, and so on.
You can also choose to have it remain stationary on the page, even if the contents of the page require scrolling. Nice.
There's another bit of code that you can add that will actually enlarge or reduce a background image as the browser window changes in size.
Locate and optimize an image you'd like to use as a background. Set its final size to 1024px X 768px—don't distort it, and don't try to enlarge an existing image unless you can reduce the PPI in proportion.
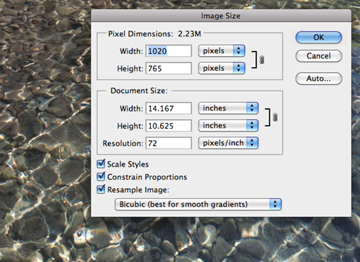
Optimize the image you'd like to use in the background. Save it as a JPG or PNG—balance the file size against the quality to determine the settings that will work best.
Open a new HTML file in Dreamweaver, and create a new CSS file as well. Save both of them in the same folder
In the HTML file, click on the Link option at the bottom of the CSS panel, then browse for the CSS file you just created.
Click on the New CSS Rule icon in the CSS panel and choose to redefine the body tag. Select your CSS file from the dropdown menu at the bottom of the Rule Definition dialog box, rather than "this document only" so it's saved to the external CSS file.
Highlight the Background category, then browse for the background image you created. Choose no-repeat for the Repeat option.
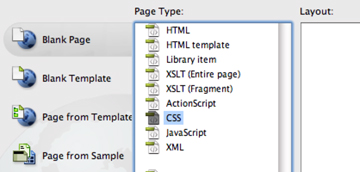
Create a new HTML file, and a new CSS file. The CSS file will be all code—no design view—and empty of any styles at this point. Save them both in the same folder.
Click the CSS tab (the open file) and note the code that was added:
body {
background: url(imagename.jpg) no-repeat;
}
Now you'll have to do a little bit of hand coding.
Replace the rule with this code instead:
body {
background: #000 url(../fingerlakes/optimizedimages/waterhorizontal.jpg) no-repeat fixed center center;
-moz-background-size: cover;
background-size: cover;
-moz-border-radius: 12px;
-webkit-border-radius: 12px;
border-radius: 12px;
}
@media only all and (max-width: 1024px) and (max-height: 768px) {
-moz-background-size: 1024px 768px;
background-size: 1024px 768px;
}
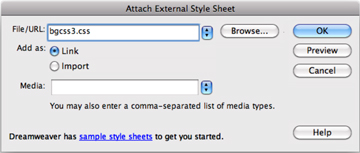
Click the Link icon at the bottom of the CSS panel to browse and select the CSS file you created to the rules you create apply to the open HTML file.
This code will specify the image you selected as the background with no repeat, and adds an attribute of -moz-background-size, which dictates how the background image will display (cover). The second declaration dictates that the background image will enlarge and reduce with the size of the browser window.
It may not display properly in Dreamweaver, so save the file and test it in a browser to see the final effect.
Obviously, if you're using a fairly colorful, or detailed, image for the background, you'll need to create some sort of color field to place any page content on so it won't disappear into the background.
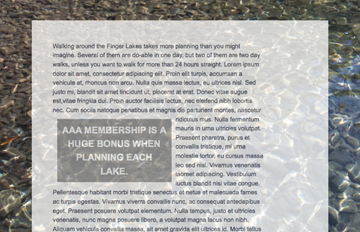
In the first code, the filter property sets the background of the pull quote to transparent as well.
First, surround the content that you want to place over a semi-transparent background with a <div> tag:
<div id="white">
for instance. Remember you can name it anything you want
Then define the ID like so:
#white {
background-color: white;
height: 100%;
filter:alpha(opacity=40); /* IE's opacity*/
left: 0px;
opacity: 0.75;
top: 0px;
width: 700px;
z-index: 99;
margin-right: auto;
margin-left: auto;
}
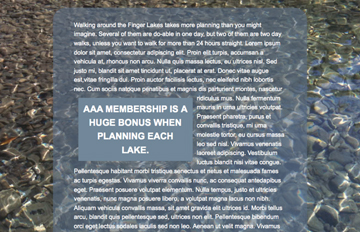
The "background: rgba" code determines the color and opacity of the box behind the text area. Experiment with different RGB values and the density of the transparency by changing the (0, 0, 0, 0.6) numbers.
Use this code below the existing code in the CSS file to create a semi-transparent black box instead:
#white {
margin: 20px auto;
width: 600px;
padding: 25px;
background: transparent url(transparentwhite.png);
background: rgba(0, 0, 0, 0.6) none; -moz-border-radius: 12px;
-webkit-border-radius: 12px; border-radius: 12px;
}
Note for this background rule we're using a parameter of "rgba." This stands for red, green, blue, alpha (or transparency). The 4th number sets the degree of transparency for the transparent PNG file. Higher numbers create more opaque shapes, and smaller numbers create more transparent shapes. Play with that, along with the RGB values. 0 means black, and 255 for each RGB value will create white. Experiment with different RGB values to see how the colored box changes.
Remember that you can easily find the hex number, or RGB values, in Photoshop by clicking on the foreground color box at the bottom of the toolbar and selecting the one you want.
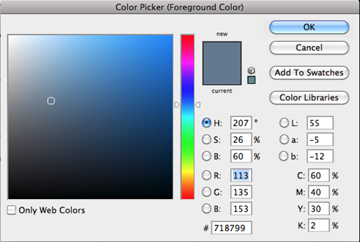
Use the Color Picker in Photoshop to determine RGB values, or the hex number for the color you want.
The border-radius piece determines the rounded corners for the text area. Larger numbers here create more dramatically rounded corners. Apply those lines of code to any block for rounded corners.
I found some of these slick tricks at http://www.alistapart.com/articles/supersize-that-background-please/ A List Apart is a terrific resource for web design issues—well worth bookmarkng!