UNDERSTANDING HTML
Let's start with an overview of how to use HTML to create the content of a web page. Cascading Style Sheets control the arrangement of the content, or layout, so we'll look at that next. After that, we'll start working in Dreamweaver to create site pages.
It's important to understand the logic and formatting conventions for HyperText Markup Language when creating a web page or site. While Dreamweaver writes the code for you as you work, there are times when understanding how the code works is critical. It isn't hard to understand the basics so please take the time to review, and even memorize the following information.
An HTML document is a series of characters that, through its special syntax, defines a document.
The fundamental pieces of HTML are the brackets that define a command, or "tag."
Opening a tag begins with placing the code within < > brackets. Closing the command requires adding a slash before the code word, also within the < > brackets.
The first part is called the "start tag." Content occurs in between the two tags and is followed by the "end tag."
To create a title for a page, for instance, you might type:
<title>My Cool Website</title>
Just about everything you do will require start and end tags. When typing code in the code inspector window in Dreamweaver, the end tag might added automatically, depending on the Preferences you set. Just type between the two tags.
<somecode> </somecode>
DOCUMENT STRUCTURE
At the beginning of every HTML document is a "document type declaration." Dreamweaver inserts this code for you, so you don't have to worry about memorizing it. Because it starts with an exclamation point, it isn't interpreted as HTML code.
<!DOCTYPE html PUBLIC "-//w3c//DTD XHTML 1.0 Transitional//EN" "http://www.w3.org/TR/xhtml1
/DTD/xhtml1transitional.dtd">
The next element that needs to exist is the head tag. All kinds of javascript. php, css styles and other coding lives within the head tags. This code doesn't display on your page; it's there to tell the browser how to behave.
The first element within the head tag is the title of your page: remember that the title is what displays in the title bar of the browser. Don't confuse it with the name of your HTML document! If you don't title your page, the browser will use a default title of "untitled"—not very professional!
<head>
<title>Walking the Finger Lakes</title>
<meta http-equiv="Content-Type" content="text/html"; charset=iso-8859-1">
<meta name="keywords" content="walking, finger lakes, upstate New York">
</head>
Now we can move on to the actual content of the document, which is contained within the <body> </body> tag.
Notice the <p> and </p> tags surrounding this sentence. Every time you want to begin and end a paragraph, you must surround it with <p> tags. <p> stands for paragraph.
<body>
<p>This is the main content of my page.</p>
</body>
There are web pages that may contain nothing but images, including text. Understanding how to deal with text from scratch, or HTML text, is important however. Text that is displayed as an image can't be read by search engines.
As you have already seen, text must begin and end with tags—at the very least, it resides within the <body> </body> tags.
The heading tags include <h1> through <h6>, with <h1> being the largest. You will use CSS rules to control the size, typeface, color and alignment of all <h> tags.
<h1>This site is about walking around the Finger Lakes for fun.</h1>
Body copy (defined by the <p> tags), headlines, and subheads, captions, and any other type of text you might need, are all formatted using CSS.
To separate one paragraph from another, make sure to surround each one with the <p> </p> tags.
To end a line without creating a new paragraph, use the <br /> tag. The <br /> tag is one of those few that doesn't require a closing tag, which is why the slash is used in the tag itself.
<h1>This site <br/>
is about <br/>
walking around <br/>
the Finger Lakes <br/>
for fun.</h1>
But just what is CSS? It stands for Cascading Style Sheets, and like the style sheets (paragraph styles and character styles) in InDesign, they control how things look.
Think of it this way:
HTML defines the content of a web page—the text and images, links, and so on.
CSS defines how that content looks including position, size, color, and margins among others.
We will get into CSS in a large way shortly.
IMAGES
There are three image formats that web browsers can recognize: GIF, JPG, and PNG.
A GIF file is a terrific format for simple graphics with no shading or variation in tone. GIF files are generally small in file size (Kb). The GIF format also supports transparency. GIF files are saved as "indexed color." That means references to any colors that are not present in the image are deleted from the file.
GIF images can have anywhere from two to 256 colors
JPG images are best for anything that's photographic, or continuous tone in nature. The JPG process compresses the file to make it smaller. This is called "lossy" compression. The fewer elements you want eliminated, the higher the resolution quality, and the larger the file. JPG does not support transparency. JPG images always have 256 colors
PNG files are not compressed, support transparency, and display graphics, as well as continuous tone images. The file sizes for PNGs are generally larger, but at times they may be the best choice.
The deciding factor for which format to use is a balance between image quality and file size.
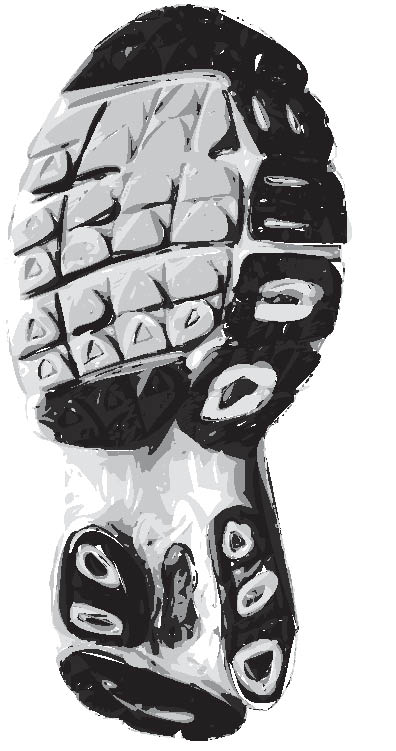
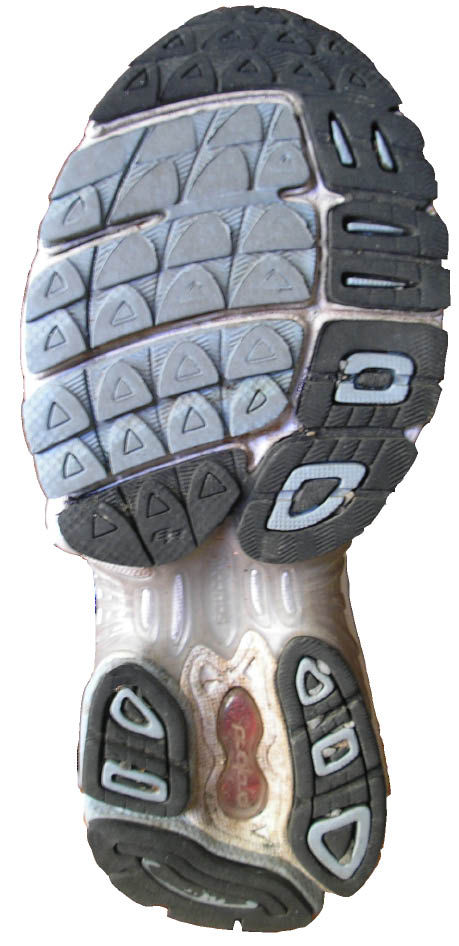
A graphic image is more likely to display better and load faster when saved as a GIF (left). A photograph should be saved as a JPG to retain all the shades and gradients of color. Choosing the degree of compression requires a delicate balance between quality and file size, so use your best judgment here.
The physical size of images is important as well. Since they are only meant to be seen on a computer screen, resolution should be set to 72ppi, and they should be cropped and/or scaled to the exact size needed. An image with larger dimensions that has to be scaled down using HTML will take a lot longer to load. An image that's been scaled larger using HTML will look horrible.
You can use Illustrator, Photoshop, and Fireworks to create and optimize images for the web; all three will export JPG, GIF and PNG files.
Once you've gotten the images together, you need to make a reference to them in the HTML code in order for them to appear on the web page.
Images placed in HTML files aren't embedded in the document. HTML code represents the path to the computer on which your images are stored. Web browsers see this path in the code and "go" to that location to retrieve the digital information required to display the image (that's why it's important to establish your file hierarchy before you begin).
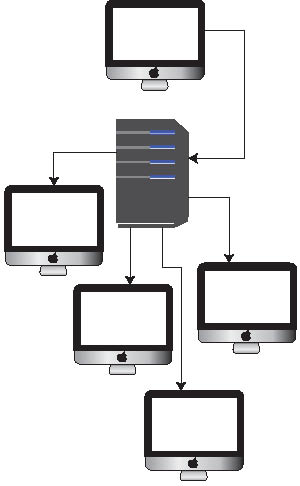
After you create a site, you transfer the files to a server. From there, browsers use the URL—the server's "address" where you site it saved—to retrieve the information and display it on anyone's computer.
There are two ways to display an image using HTML. The first is an "absolute path," which requires a reference to the entire URL, or address, of the image and is written in HTML like so:
<img src="http://domainname.com/foldername/sneaker.jpg" width="300" height="100">
A "relative" path is easier to type and can be used very successfully as long as you manage your assets in an organized set of folders:
<img src="sneaker.jpg" width="300" height="100">
This path depends on the fact that the page being displayed resides within the same folder on the computer as the image. That is to say, you can eliminate the part of the code that is common to both the page and the image. If you keep images in a separate folder, you would need to add that folder name to the code:
<img src="myicons/sneaker.jpg" width="300" height="100">
Note that <img src> is another tag that doesn't require closing, and that the source path and dimensions are all placed between quotes. These pieces of text are referred to as "strings" since they are actual words in the English language and not HTML code. You'll find, when you delve into other languages, like ActionScript, or JavaScript, that they all have specific words that the language interprets in a specific way.
BACKGROUNDS
I'm sure you've seen a variety of background colors and sometimes, textures, patterns, and images.
There are 256 colors to choose from; each has a 6 character reference code called a "hex code". White = #ffffff and black = #000000. All color specifications need to be preceded with the number sign, or hash mark (#). If you've used the color panel to mix a color, it will be assigned the appropriate code; you can use a color not in the "web-safe" palette, although it may display differently on Macs vs. PCs.
To create a textured background, or a repeating image, you need to specify a GIF or JPG file to use, and indicate whether it should repeat across the X axis, or along the Y axis, or both. You can also set the image to not repeat at all, to have it scroll with the page, or remain stationary.
CSS rules can be used to specify whether and how a background image will enlarge or reduce, depending on the size of the browser window (viewport) and whether it will scroll or remain constant.
Background styles are defined using the <body> tag:
<body background="file:trail.jpg">
or
<body bgcolor="#CCCC00">
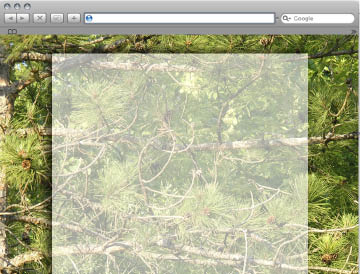
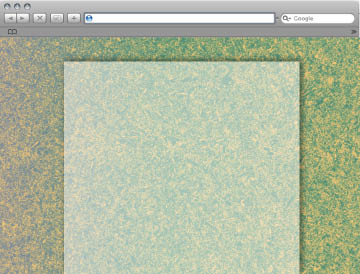
A simple CSS rule adds a background image, overwhich you can add and position any content you want. In straight HTML, the image is added to the <body> tag.
TABLES
Tables are one way to create a standard format for all the pages in your site. They require diligence to manage but the look of your site can benefit from their use. Creating the layout of a page using CSS is much smarter and best practice, but in a pinch, a table can work wonders.
There is a lot of coding that goes on in creating a table. It's all fairly logical, however, if you remember the open < > and close </> tags for each cell, and each row.
It's a good idea to have a plan for what you will need by sketching out a table first: we'll use a table with three columns and four rows:
Ultimately, we'll combine some columns and rows to create a table that looks more like this.
|
This is about walking. |
 |
|
|
Walking around all the Finger Lakes |
||
<table> and </table> tags. Everything in between these tags will either determine the configuration of the table, and/or the contents of each cell.
Within the opening <table> tag, you can specify the width of the table in either pixels or percent, the width of a border, if you want one, and the alignment of the table in relationship to the page. Cellpadding refers to space inside each cell, bouncing the contents away from the edges. Cellspacing is space between each cell and row.
<table width="100%" border "0" cellpadding="5"> </table>
In between the opening and closing table tags, the next line of code begins the first row <tr>. It also establishes that the contents of the cells in that row will align to the left and top edges of the cells. Once this row is filled, you close it with a </tr> tag.
<tr> </tr>
After establishing a row, use <td> tags between the <tr> tags to define the cells in that row (table data). Since we are defining a table with three columns, we need to create three cells in each row.
<tr> <td>This is about walking.</td> <td> </td> <td> </td></tr>
The second cell in the row is created with another set of table data <td> tags. The " " code means the cell is empty.
Then we begin to define the third cell with the <td> </td> tags.
However, if you take another look at our plan, the third column has been merged into a single large cell, including all 4 rows. The rowspan tag merges cells together within a column, so the code for the first row is actually:
<tr>
<td>This is about walking</td> <td> </td>
<td rowspan="4">img src="/sneaker.jpg"</td>
</tr>

This cell includes the img src code needed to display the photo of the sneaker, and then closed with the </td> tag. The row is closed with a </tr>.
The second row has 3 cells as well but we only have to define 2 of them, since the third one was merged with the previous row (rowspan="4").
Since we're not putting anything in either cell, the <td> content for both cells is "&nsp;"
<tr>
<td> </td>
<td> </td>
</tr>

The third row also has 3 cells; again, only 2 need to be defined because of the rowspan="4" formatting in the first row.
<tr>
<td> </td>
<td> </td>
</tr>
Both cells are empty. The third cell is taken care of with the rowspan. Then the row is closed with a </tr>.

<tr>
<td> </td>
<td> </td>
</tr>
The next commands create the final row <tr> and begin to define the contents of the first cell in that row <td>.
To combine two cells within a row, you use the colspan tag—in this case, we're combining the first two columns (colspan="2"). Since we are combining two cells into one, and the fourth cell is still controlled by the rowspan="4" from row one, we only need to define one cell.

<tr>
<td colspan="2">Walking around all the Finger Lakes is a total of 435 miles.
</td>
</tr>
</table>
Finally, we've finished the table.

Since we set the border to "0" when we created the opening <body> tag, the final results will have no strokes attached to the cells.
To define a background color or colored text for the table or individual cells, you would create CSS rules for the <table>, <tr> and/or the <td> tags. If you wanted to have different colors for certain cells or text areas, then you'd get into CSS rules called "classes." A CSS class can be applied to any HTML element.
Without any formatting or contents, the bare code would look like this:
<table width="80%" border "0" cellpadding="5">
<tr>
<td>cell content</td>
<td> </td>
<td rowspan="4"> </td>
</tr>
<tr>
<td> </td>
<td>cell content</td>
</tr>
<tr>
<td>cell content</td>
<td> </td>
<td rowspan="4"> </td>
</tr>
<tr>
<td colspan="2">cell content</td>
</tr>
</table>
Why do you need to know all this? Well, even though Dreamweaver makes it easy to add columns or rows to a table after you've already inserted one, it's nice to understand the structure so you can alter the code manually if needed. And, there have been times when poor planning makes that necessary.
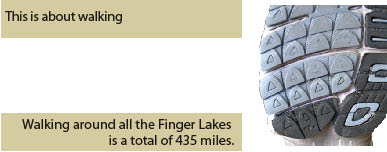
You'll learn how to define background colors for tables as well as pages in the next chapter.
LINKS
There are many reasons why you might want to create a link, or several, in your site. The first is so the viewer can navigate from one page to another within the site, either on the same page or a different page. Another is to provide further reference to your viewer—sending him or her to another site for more information; the third kind of link generates email.
Linked text is typically underlined and a different color from the rest of the document text. You can specify the color of links before they are clicked on, to change color when someone mouses over it, and a third color to indicate the viewer already clicked on it. You can also use CSS rules to determine whether it's underlined or not, and when the underline appears.
<a href=" "> is the beginning of a link tag. The text that becomes the link comes next, then the closing tag </a>.
For an external link, the syntax is:
<a href="url you want to link to">the text you want underlined</a>
Note that the URL must be contained within quotes.
To link to another page within the site, you can use a relative link. If the HTML file is in the same folder as the current document, it would simply be:
<a href="filename.html">the text you want underlined</a>
If it were in a different folder, then you'd need to add the folder name first:
../foldername/filename.html
Note the two dots and slash before the folder name.
For a link from one place on a page to another, you need to define a "named anchor" next to the text or image you want to link to.
Create the named anchor by inserting your cursor where the anchor is to appear (that is, where you want to jump to when a link is pressed) and typing:
<a name="somename"></a>
where "somename" is the name of the anchor.
To create the link, surround the text you want to trigger it with:
<a href="#somename">someword</a>
Anchor links must be proceeded by #.
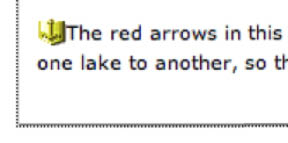
Create a named anchor by using the <a name=" "></a> code, and typing a simple, descriptive word in between. Create the "trigger" that will jump to a named anchor using the <a href="# "> </a> code and adding the word or image source in between. Note that when coding a named anchor, it must be preceded with a number sign or hash mark (#).

First create the anchor—where you want the link to take you.

Then surround the word(s) or image with the <a href> tag to create the actual link.
There is no reason why a link has to be text. If you want a picture to trigger a link, simply surround the <img src> tag with the link tag by typing the path to the image you want to use as a link, rather than typing text. This is the same code you'd use to make a button image into a link:
<a href="url you want to link to"><img src="sneaker.jpg" width="400" height="267" /></a>
To make words or an image trigger an email response, the code is simply:
<a href="emailaddress">someword</a>
So you can see that the pattern for a link is to start with the link information—where you want the link to go—then the text or image you want the user to click on to trigger the link, and finally, the closing tag.
COMMON TAGS
There are several basic tags used in HTML. Memorize them now, since CSS uses them to control how things are positioned and formatted.
- <A> </A> Anchor.
- <B> </B> Bold (this is being phased out in favor of <strong>)
- <BIG> </BIG> Large type
- <BLOCKQUOTE> </BLOCKQUOTE> Text is displayed as an indented block and is commonly used for long quotations
- <BODY> </BODY> The portion of the HTML document that will be displayed on a web site
- <BR/> A line break within a paragraph
- <CENTER> </CENTER> Content is centred on the page
- <DIV> </DIV> An area within a page that contains block-level elements used with style sheets
- <EM> </EM> Italics
- <FONT> </FONT> Specifies typeface characteristics using attributes such as size, color, font, size, and color.
- <HEAD> </HEAD> The head part of the HTML document
- <H> </H> <h1> through <h6> are headings
- <HR> Create a horizontal line
- <I> </I> Italics (this is being phased out in favor of <em>)
- <IMG SRC> Image
- <LI> </LI> List item that's part of an ordered (<OL>) or unordered (<UL>) list
- <OL> </OL> Ordered list; includes numbers before each item
- <P> </P> Paragraph
- <PRE> </PRE> Will display the text exactly as typed
- <SMALL> </SMALL> Smaller-sized text
- <SPAN> </SPAN> An area within a page that contains in-line content used with style sheets.
- <STRONG> </STRONG> Bold
- <SUB> </SUB> Subscript
- <SUP> </SUP> Superscript
- <TABLE> </TABLE> Table
- <TD> </TD> Table cell
- <TITLE> </TITLE> Title of the document placed within the <HEAD> tag
- <TR> </TR> Table row
- <U> </U> Underline text
- <UL> </UL> Unordered List. Includes list items displayed with bullets
CASCADING STYLE SHEETS | CSS
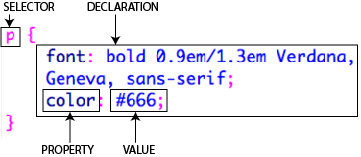
CSS rules consist of a selector (a tag, a class, a compound, or an ID). Compound selectors affect very specific portions of a page. After the selector comes the declaration, which consists of one or more properties, and values for each property.
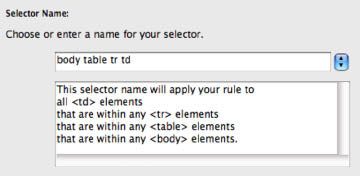
Compound selectors are very specific as to what they will affect. Specificity is what controls the "cascade" part of Cascading Style Sheets (CSS).
The concept of CSS was introduced some time ago, but has only recently become an important piece of HTML coding. CSS properties control the look of just about anything you can think of: they deal with positioning, color, borders, and a variety of other aspects of the images, tables, layers, and text use in creating a web page. Think of them like the style sheets you create in InDesign, only with more options. You should use CSS to dictate the layout of something entirely. See http://csszengarden.com/ for samples of the same content with different layouts all controlled by CSS.
A CSS style, or rule, is composed of two elements: the selector (or type), and the declaration. The declaration has two pieces: the property being targeted (like font-color, for instance) and the value (red).
There are four kinds of CSS selectors: Class, Tag, ID, and Compound.
In the order I find them most important, they are:
ID selectors can only apply to one element in an HTML document, period. For instance, if you had a banner that you wanted to position at the top left of the page, you could create an ID that dictates that position. You would not want to use that rule to position another element as they would then overlap.
A Tag selector controls the HTML code in a document across the board. Redefining the <p> (paragraph) tag to define the type as blue, bold, 15 pixels in size, and centered means that all the type that is surrounded by the <p> tag will have those characteristics. You can override this style using a Class.
Redefining tag styles can control the positioning of elements, the contents of table cells, the look of lists and a host of other properties.
A Class selector can be applied to individual elements in an HTML file. For instance, you could create a style that defines the type as blue, bold, 15 pixels in size, and centered. Once defined, you can apply that style to any text you want as you go along.
A Compound selector is used when you want to redefine several aspects of something at once. For instance, if I had a paragraph inside a table that I wanted to format in a specific way, the CSS rule would be applied to all paragraphs that are within a cell, inside a table row, and inside a table. In other words, a rule like this would affect all the text <p> contained in all the tables in my document (see the illustration, left).
When you create new CSS rules you can choose to keep them local—that is, attached to the current document only—or to save them in an external file. The beauty of external CSS files is that you can attach them to all the pages in a site, controlling the look of the entire site in one fell swoop. Editing the external CSS file automatically updates all the files that it's linked to. Much nicer than having to open all the pages in your site and changing each one individually!
To create a style, click on the "new style" icon at the bottom of the CSS panel (it looks like a note pad).
You can edit an existing style by changing the properties in the bottom half of the pane, clicking the pencil icon at the very bottom, or double-clicking the rule in the top half of the panel.
If you've already created an external CSS file, you can attach it to a new document with the "link CSS" icon (chain) at the bottom of the panel.
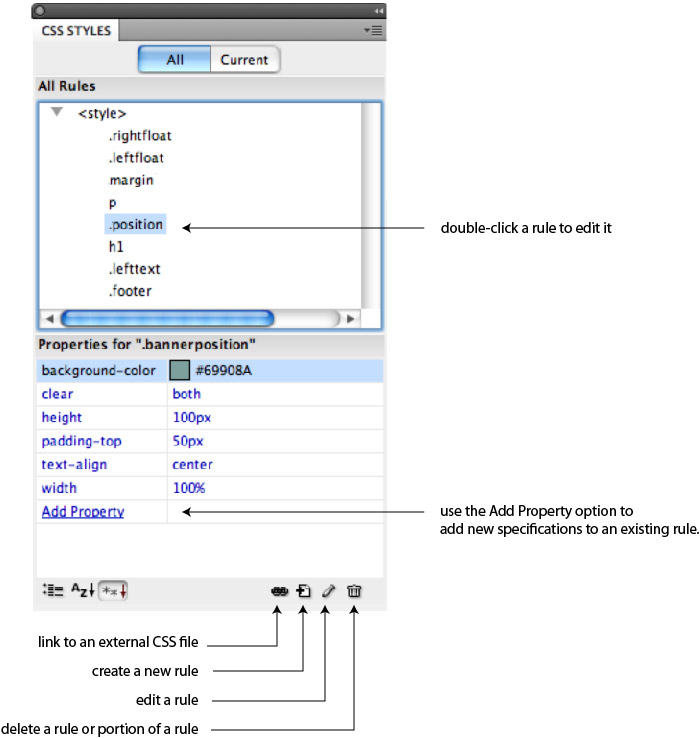
Click the chain icon to attach an existing CSS file to the current document, or on the pad icon to create a new style. Use the pencil to edit an existing style (or double-click the style name in the All Rules portion of the panel, or type them in by hand in the Properties portion of the panel). Select a style and click the trash icon to delete it.
When you create a new style (by clicking on the pad icon) you need to decide several things:
First, what kind of rule, or selector, you are going to create (Class, Tag, ID, or Compound).
The second step is to give it a name. Frequently, Dreamweaver will suggest a name for you if you have something selected in your document. Feel free to use that name, or type in a more descriptive word so you know exactly what it's going to do. In the case of redefining a tag, however, you must use the actual HTML for that tag as the name of the selector.
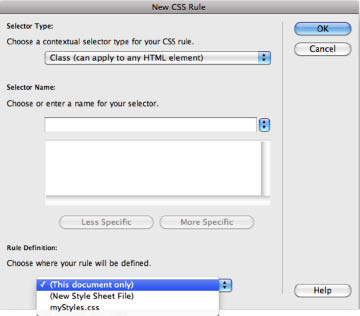
Choose the selector type you are going to create, give it a name, and determine where to save it. Choose (this document only) if you want to keep all the styles in the <head> portion of the document. Select (New style sheet file) if you plan on using the same CSS rules in several different HTML files.
Finally, you need to decide whether the formatting you are going to define should remain "local" (in this particular document only) or more "global" so you an use it in other pages in your site. If you choose to create an external style sheet, you will be prompted to save it. Make sure you save it in your site root folder.
Once you click OK to exit the New CSS Rule dialog box, you will be presented with another panel that offers a myriad of choices.
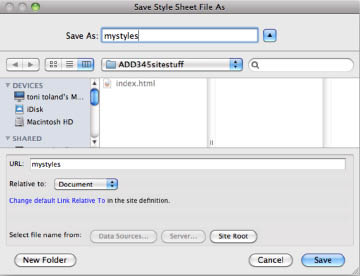
If you choose to save the CSS rules to an external file, you will be prompted to name it and place it—choose your root folder. Dreamweaver automatically adds the CSS extension for you.
TYPE
The first category is about defining the Type, or text, options. It's too bad that you can't use just any font for text created in Dreamweaver. You do have choices that fall into four basic categories—serif, sans serif, monospaced, and script—in various combinations. These typeface options are based on the standard fonts that almost everyone has on their computer, regardless of the operating system they are using. While you can add fonts using the Edit Font List option, you cannot be guaranteed that someone looking at your page will have that font on their system. Do so, if you wish, but include a "serif" or "sans-serif" option just in case. The list of typefaces in each option is called a font stack.
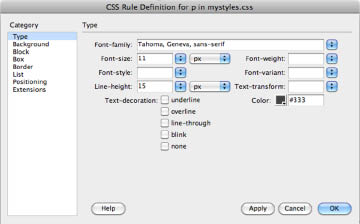
Select typeface, size, leading (line height), weight, and color using the Type category.
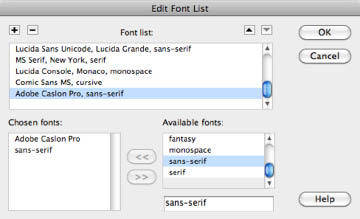
If you want to add a specific font to the available options, use the Edit Font List at the bottom of the Font-family list to select the typeface. Add a sans-serif or serif option to the style so if someone doesn't have the font you've added, s/he will see a close approximation.
Size can be determined in points, picas, pixels, mm, ems, percentages, etc. First either type in a number, or select a size from the popup menu. Then select the measurement system you want to use. Many designers define the <body> tag at 100% to determine a basic size, and then use the em unit to resize text as necessary. The em amount you specify will be relative to the user's browser settings: http://www.alistapart.com/articles/howtosizetextincss/.
Style choices include normal, italic, and oblique.
Line height is the same as leading. If you've chosen points for your type size, choose points here. Or pixels and pixels. Just be consistent. To specify anything other than "normal," you must chose (value) from the popup menu, and then type in a number.
Weight is a tricky issue. The numbers (100–900) are absolute values and change depending on the font and browser someone is using. 100 is the lightest weight, 400 is average, and 900 is the heaviest. Bold and bolder, normal and lighter are all relative to the default weight of your font.
Variant means you can use small caps instead of upper and lower case letters. As is true with using small caps in a layout program they are just smaller versions of capital letters. This results in their being lighter in weight than normal lower and upper case letters. If you want small caps, try to isolate them from "normal" type so the discrepancy isn't as obvious.
Case, on the other hand, refers to using all caps, all lower case, or what's called "title case" where each word is capitalized.
Select a color from the color chart, or type in the hex code for the color you want. NOTE: if you've selected a particular color in Fireworks or Flash for certain things that you want to remain consistent, write down the hex code so you can match it here. Start all hex codes with #.
If you want a color to match on that's in an image on your page, click the color box, then move the eyedropper over the image to sample it. Very cool.
Decoration options include underline, overline, strike through, blink, and none. Underlines are typically used to indicate a link, so I'd suggest avoiding that unless you are creating a style for your links using the <a> tag. On the other hand, using overline and underline options can create an interesting effect. Please don't use the Blink option though—it's really obnoxious!
BACKGROUNDS
Background options are very powerful! While you can set a background color or image using Modify > Page Properties, by defining background options in a CSS style, you have more control over the other pages in your site.
You can use a different backgrounds for each selector (rule) you create and they can be photos or graphics.
Select a color for a solid background from the color panel or type in a hex value (or sample a color from a placed image): remember to note any hex values you've used in Flash or Fireworks for consistency.
If you want a graphic for the background, use the "browse" button to locate a GIF, JPG, or PNG. Note that you can have both a background color as well as a background image.
The Repeat feature controls how the background image displays. If you don't choose anything here, your image will tile—that is, repeat from left to right and top to bottom in a pattern.
Select repeat-x to have your background image tile horizontally only—a nice way to create a decoration across the top of your page.
Choose repeat-y to create a border down the side of your page.
If you want to assign a background image that appears once, choose no repeat.
![]()
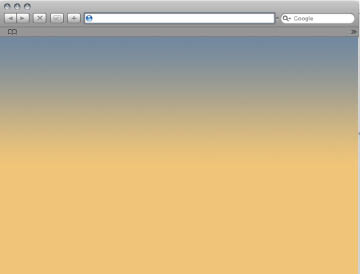
For a gradient background, create a very thin JPG image of the gradient. Use CSS to have ti repeat along the X axis. So it doesn't stop abruptly, set the background color to the same as the bottom gradient color. To have the gradient go from left to right, simply create a horizontal stripe and repeat it along the Y axis.
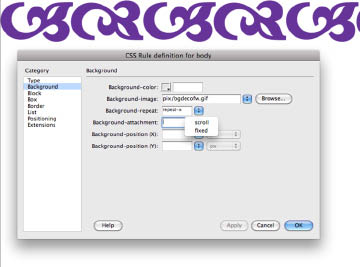
Select background color, and/or image,as well as positioning and repeat options using the Background category.
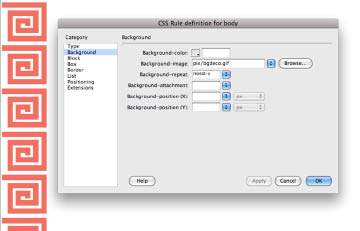
Choose repeat-x to create a pattern across the top (above), or repeat-y to create a vertical border.
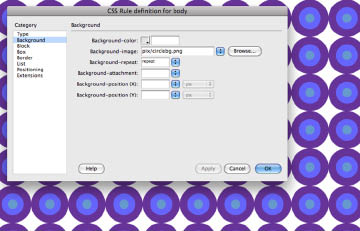
To create a patterned background, select repeat.
Use the attachment option to have your background scroll with your page, or choose fixed to keep it stationary even if the page scrolls horizontally or vertically.
Use horizontal and/or vertical position settings to move your image down from the top, and in from the left side.
YOUR TURN
Open a new HTML file (refer back to last week's lecture if needed) and create a couple of CSS rules saved in the current document:
Re-define the <p> (paragraph) tag using the Type category
Re-define the <h1> (headline) tag using the Type category
Add a background color or image
Then add some text that describes the process you used to accomplish this.
Save the page as background.html and give it a title, then upload it to your webspace.
Share the URL by adding it to the URLs discussion area.

BLOCK
Dreamweaver considers any chunk of code between an opening and closing tag a Block. So anything between two <p> (paragraph) tags, for instance, is a block. Or, anything between two table data tags <td> is a block. Use this portion of the CSS style definition options to determine word and letter spacing, the position of text or images (vertical alignment and text align) as well as a text indent (for paragraphs). NOTE: this is the only way you can indent a paragraph (short of other more complicated and less appropriate options). Use the Text-indent property to create a proper paragraph indent.
The Vertical-align option affects the <img> tag, while Text-align is about paragraph formatting. You can "cheat" and apply a center attribute to center images, or the whole page in a browser, too. There is a better way to do that, however, which we'll get to once we start actually creating CSS rules.
Whitespace refers to spaces typed into a block of text: "normal" eliminates any extra spaces, while "pre" leaves them as is.
Nowrap means the text will not wrap to a new line unless there is a <br/> (soft return) tag to make it happen.

Letter and word spacing, as well as text alignment, are all controlled using the Block category.

Small caps are just a smaller version of the capital letters, and are therefore always a bit lighter than "normal." Use with care.

Because every element—whether it's a paragraph a headline, a table cell, or an image is considered a "block" element, you an assign different properties to them (like this background color, above) by creating classes.
The display feature controls how the text block will display.
From http://www.w3schools.com/css/pr_class_display.asp:
none: The element will generate no box at all
block: The element will generate a block box (a line break before and after the element)
inline: The element will generate an inline box (no line break ;before or after the element). This is default
inline-block: The element will generate a block box, laid out as an inline box
inline-table: The element will generate an inline box (like <table>, with no line break before or after)
list-item: The element will generate a block box, and an inline box for the list marker
run-in: The element will generate a block or inline box, depending on context
table: The element will behave like a table (like <table>, with a line break before and after)
table-caption:The element will behave like a table caption (like <caption>)
table-cell: The element will behave like a table cell
table-column: The element will behave like a table column
table-column-group: The element will behave like a table column group (like <colgroup>)
table-footer-group: The element will behave like a table footer row group
table-header-group: The element will behave like a table header row group
table-row: The element will behave like a table row
table-row-group: The element will behave like a table row group
inherit: Specifies that the value of the display property should be inherited from the parent element
BOX
The Box element deals with positioning elements in relation to others and dimensions. This portion of the style definition box allows you to physically position objects (paragraphs, images, or a table, for instance) on the page, rather than having everything follow a rigid top–to–bottom format.
Width and height determine the size of the box. If you want the box to be flexible in terms of height, don't put a measurement in.
Float creates something like a force field around an element, so that other objects "float" around it—a text wrap of sorts. Choose from left, right or none.
Float left means that the next box element will be positioned to the left of the previous box element.
Float right places the content to the right and following elements to the left.
In either case, it's best practice to add a margin so the elements don't collide at the left or right.
Floats are a great way to create multiple columns in a layout.
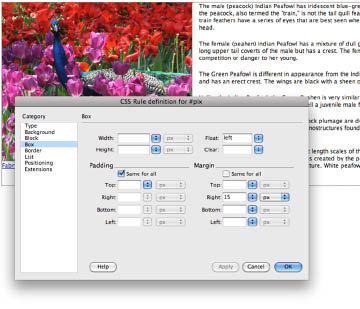
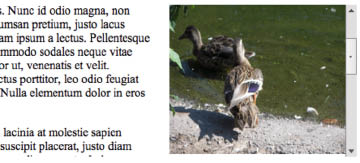
The Box option is one of the better ways to organize/arrange elements on a web page, using Float and Clear properties. In this illustration, the image has a left float applied, and a margin of 20px so the text isn't slammed against it.
Clear creates a "force field" to either side of a box element so that multiple box elements don't overlap.
Padding refers to the white space around the inside edges of a box object.
Margin refers to additional space surrounding a box object. You could choose either padding or margin, but probably not both unless you specified a border or background color for the object. At that point, you'd want padding to move the text away from the box edge, and spacing to move the box away from adjacent elements.
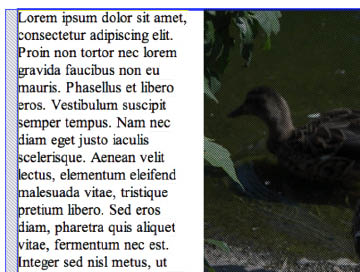
Adding a margin around a block object creates space around it.
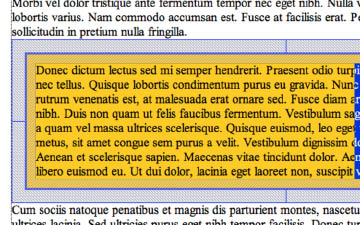
Use a margin and padding to isolate elements within a block and prevent the contents from slamming up to the edge.
BORDERS
If you've assigned block and/or box properties to an element, you might want to include borders. There are several styles to choose from including dashed, dotted, solid, double, groove, ridge, inset, and outset.
You can also specify a weight (width) in pixels, inches and so on, and a color. Note that you can leave "same for all" checked and whatever you select for "top" will apply to all the sides. Or, you can specify something different for each side by unchecking the "same for all" box.
Experiment with using a border above and below a subhead, with no side borders. Or just a border below something to establish a visual hierarchy.
When you have established a box element, as with the examples at the right, you can also set them apart visually by using a background color for the box portion.
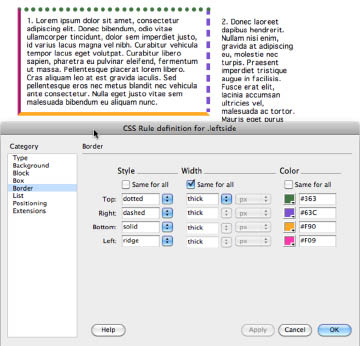
Use the Borders category to create distinct edges between elements. While this example is horrible, you can actually create some very elegant effects with borders
LISTS
Lists can be ordered, unordered, or definition lists.
If you want an ordered list <ol>, use highlight the text first, and then use Format > List. Choose Ordered, and then use Format > Properties to determine what sort of numbering system you want to use (numbers, roman numerals, alphabet, etc.).
Unordered lists <ul> use bullets to separate each list item. You can select from some preset bullet types by creating a CSS style for list items <li> or you can select one of your own making.
List items of any sort are identified by hard returns, so if you get a paragraph with only one number or bullet, you need to go into design view and add hard returns between each item.
I find that, at the very least, I want to add more leading between list items. To do that, simply redefine the <ol> tag and use the Type properties to change the line spacing.
In the List properties CSS panel, List-style-position determines how long lines in a list will wrap. Choose "inside" to have the lines wrap to the bullet margin or "outside" to keep the list within the text margin.
NOTE: because lists are not proper paragraphs, per se, you may have to add Type options to set the typeface, size, and so on, to match any <p> rule you might have created.
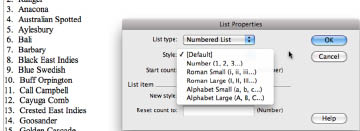
If you need an ordered list, use Format > List > List Properties to select the style.
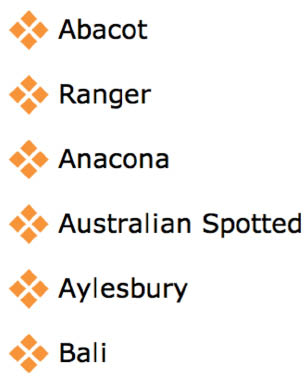
Create a CSS rule to use a unique bullet style(s) developed Photoshop, Illustrator, or Fireworks.
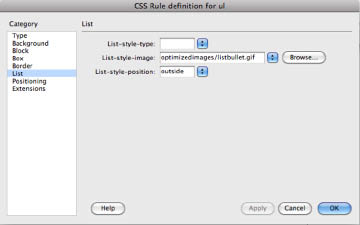
Below: redefine the ul tag in a style and select the bullet image you want to use from the Line-style-image browse option.
POSITIONING
Positioning specifications control where on the page block elements appear.
Absolute positioning will place something exactly where you specify in the Placement portion. This takes it out of the normal flow of the document, allowing everything else to move up, filling the empty space. This will usually hide some of the content, so you need to develop a CSS style to make adjustments. Usually, you would surround the absolute item with a <div> and the rest of the content with another <div>. Use the Margin property to move the rest of the content below the absolute item.
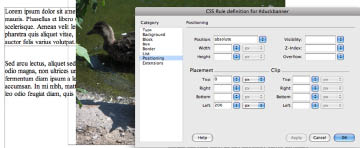
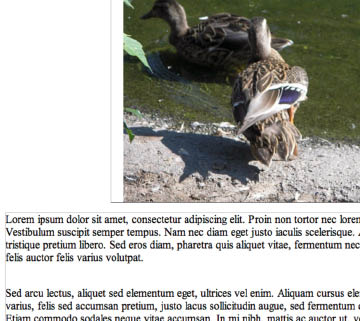
Top: when something is positioned as "absolute," everything that follows it moves up behind it.
Bottom: create a separate DIV for the remainder of the content and use the Margin option to position it below the absolutely positioned element.
Relative positioning determines the position of the element relative to its placement within the document—that is, where it would have been, if you hadn't established a CSS rule for it. If you create a class for relative placement, you can use it multiple times in different areas of the layout. Relative positioning will leave an empty space where it should have been.
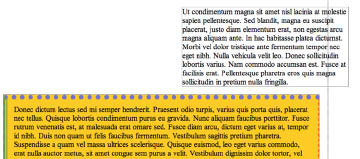
When something has been assigned a "relative" position, it will shift, but leave an empty space where it was. It's best used to move something slightly, rather than for layout.
Static positioning means the element stays exactly where it was created. So, when the page scrolls, this element will not scroll with it. This is a great option if you want a background, menu, or set of links to remain the visible and static, no matter what.
You can assign a width and height to an element—independent of where you are going to position it. You can also do this in the Box category.
Visibility—inherit, visible, or hidden— determines whether the element is visible or not. "Inherit" means it will be hidden or visible depending on its "parent." If the object isn't nested inside another, its "parent" is the page itself, and it will be visible. Setting elements to invisible is used to create dynamic pages using Javascript.
Use "auto" in the Overflow option to have scrollbars appear if/when necessary. This will only work when you've specified a height that is too small to accommodate everything.
The z-index of an item controls its stacking order, like layers in Illustrator. A z-index with a higher number is placed above (or on top of) one with a lower index number. It's a good idea not to use sequential numbers for z-indexing in case you need to sandwich something in between two layers later (i.e. if you had 3 and 4 already assigned, you couldn't put something between them later without going back and re-assigning their z-indexes).
Overflow determines what happens if the size of an element (as determined by width and height) is too small to display all the content. "Visible" will show everything, no matter what the size is—resulting in a longer box than anticipated. "Hidden" will cut off any parts that fall outside the dimensions. Choosing "scrollbars" will put scrollbars around the box whether needed or not. And "auto scrollbars" only adds them if needed.
Clipping is sort of like cropping: it determines what content will show and what part may be hidden.
Well, you may be asking, where does all this code go? Excellent question!
YOUR TURN
Create a new Dreamweaver file and set the view to Split, so you can see both the Code and the Design parts.
You'll use the CODE portion of the document window to create three <div>s and IDs.
To create a <div> in the code area, place your cursor between the two <body> </body> tags and type:
<div id="wrapper">
</div> <!--closes the wrapper div-->
Then, between those two tags, create a second div like so:
<div id="wrapper">
<div id="maincontent">
</div> <!--closes the maincontent div-->
</div> <!--closes the wrapper div-->
Finally place your cursor after the "maincontent" closing </div> and add the third one:
<div id="wrapper">
<div id="maincontent">
</div> <!--closes the maincontent div-->
<div id="pix">
</div> <!--closes the "pix" div-->
</div> <!--closes the wrapper div-->
The Design half of the document probably only has a single thin box defined by a dotted line.
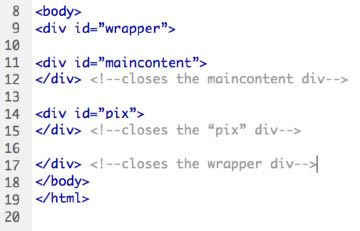
Your code should look like this. Note that the elements between the <! and > create a comment, which helps you remember what you did, but doesn't get "read" as HTML when the page is viewed in a browser.
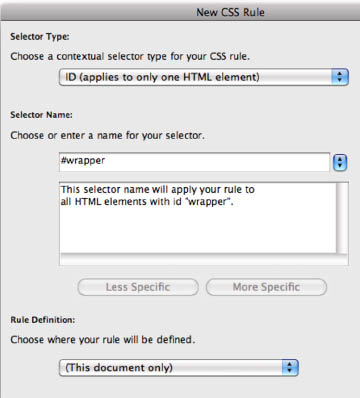
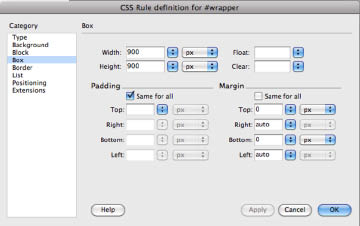
Create a new ID selector for the #maincontent div (top). Use the background category to give it a Background color, and the Box category to specify a width, height, and margins (bottom).
Save your file. We'll create some CSS rules to have them show up as separate elements after learning more about styles next.
DEFINING STYLES
As mentioned previously, when defining a CSS rule, you can keep it local—that is, in the actual HTML file you are working on. If the page uses styles that will only be used on that page, selecting (This document only) when prompted to save the file will place all the rules at the top of the code inside the <head> </head> tags. Notice in the screenshot that the rules are sandwiched between <style> </style> tags.
There are two ways to write styles in code view: longhand, and shorthand. Which you use is up to you, and there is a option in Dreamweaver > Preferences > CSS Styles where you can indicate whether you want to use shorthand or not.
Written in absolute form, a rule looks like this:
p {
font-family: "Arial Black", Gadget, sans-serif;
font-size: 10px;
line-height: 11px;
color: #363;
}
In this format, the tag (in this case, the paragraph tag) starts the code, which is surrounded by { } curly braces. Flash ActionScript uses the curly braces convention as well; they indicate what should happen. In Dreamweaver, it's about how to display an item. In Flash, it's often about creating interactivity.
Then, property names are used to define what aspect needs to be addressed (font-family, font-size, and so on). Properties describe specific aspects of an element.
Colons ( : ) separate the property from its value, and each property description ends with a semi-colon ( ; ). This is an ActionScript convention as well; it's the equivalent to a period at the end of a sentence.
http://htmldog.com/reference/cssproperties/ has an excellent list of all the properties used in CSS rules along with examples for how they are used. Bookmark it!
In shorthand, the rule would be typed as follows:
p {
font: normal 12px/17px "Palatino Linotype", "Book Antiqua", Palatino, serif;
color: #639;
}
Note here that instead of listing four separate properties to define a paragraph rule, shorthand uses simply the "font" property, and then describes all the attributes in more of a string. In this case, since we chose a font color, it's listed as a second property. If we left the default set to black this line would not be required.
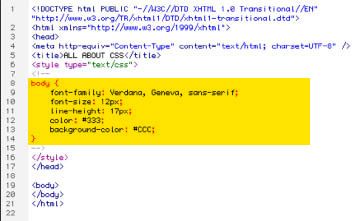
Internal CSS rules are placed within the <head> </head> tags, surrounded by <style> </style tags.
This is, in the scope of things, pretty easy code to write from scratch. Using the CSS panel is perfectly legitimate, but once you have a rule, it's can be easier to tweak the code than to edit the rule in the CSS panel.
When first defining a CSS rule that you want to save in an external file, select (New Style Sheet File). Give the file a name and navigate to the site root folder (where you are saving all your files) to save it. After creating this external file, use it to define all the rules that you want to reuse in other HTML documents.
Do NOT create a separate external CSS file for each individual rule or for each page you create in a site. You only need one, and it should include all the rules for the site you're working on.
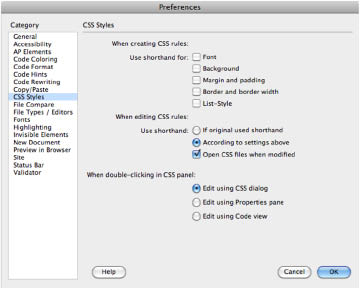
Use Dreamweaver > Preferences > CSS Styles to specify whether to use shorthand for writing rules or not.
An external style sheet is straight-up code—you cannot look at anything in design view. How the code is written, however, is identical to styles that are defined internally.
External CSS files are saved with the CSS extension ("myStyles.css" for instance) in the root folder, so they can be accessed by any HTML documents in the site that use them.
Whenever you make a change or addition to an external style sheet and then save the HTML document that is linked to it, Dreamweaver saves the CSS document as well (you may get a warning box asking if it's OK to save it; just click OK).
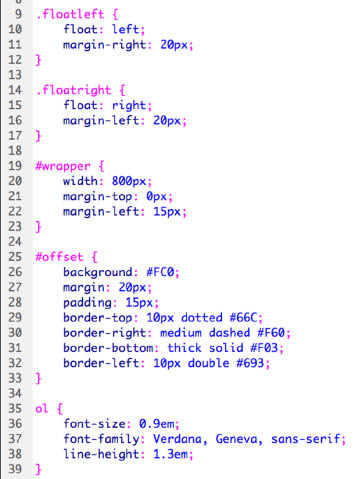
An external style sheet uses the same code syntax and formatting as styles defined internally. Classes, which can be assigned to multiple elements in an HTML file, are indicated using a . (period or dot), and DIVs are indicated with a # (hashmark).
The screen shot above illustrates how Classes and IDs are formatted, as well as HTML tags. Note that a Class always begins with a . (period), and an ID uses a # (hash mark). A Compound will be noted by the last word in its selector with a hash mark as well. Tags do not require any marks.
Any time you want to use CSS to define the position, color, decoration, etc. of something on a page, you will use either a <div> </div> or <span> </span> tag to set that content apart.
As you've already experienced, <div> tags are used to surround HTML content in "boxes' referred to as block-level containers. If you recall, any paragraph of text or image, is considered a "block" in HTML. You can create the <div>s you need in code view, or use the Insert panel to add them.
The <div> tag is used to organize and arrange content. Start with a "wrapper" div that will surround all the content on a page, and then use additional div's to organize different chunks of content; create a sidebar, for instance, or position a menu, and so on.

At the bottom of the New CSS Rule dialog box, you can choose to define the rule in the current document, in a new external CSS document, or, if you already have an external CSS file, to add a new rule to it.
Once you have established a <div>, you can then assign a CSS rule to it in code view like so:
<div id="maincontent"> Why would anyone walk around the Finger Lakes? Does that sound like fun to you?
</div>
You've already had some experience with that.
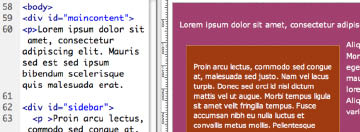
Use <div> tags to arrange different portions of a page—a banner, a menu, main content, a sidebar, and so on.
There are two different kinds of rules that can be assigned to the <div> tag. Above, an ID called "maincontent" has been assigned. An ID can only be assigned to one element in a document. Choose the ID selector in the New CSS Rule dialog box.
Classes are rules that can be applied to any number of elements in a file. For instance, if you wanted separate sections on a page all to have the same border, you could create the Class rule and then assign it to each text block (or image):
<p class="myformatting"> This is the content that has been created between two div tags, and then controlled by a CSS rule as to position, border and border color, typeface and size, and so on. </p>
<p class="myformatting">Use DIVs for large chunks of content.
</p>
<p class="myformatting">A class can be applied to multiple elements in a document. A div can only be applied once.</p>
"myformatting" is a class that was defined using the CSS panel and is assigned to multiple objects.
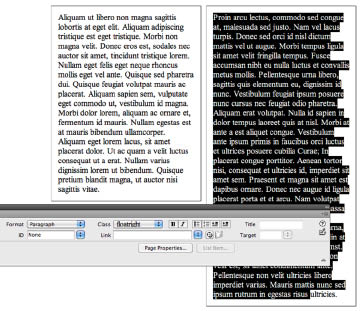
Create a class when you want to format several objects the same way. Assign classes to an object or block using the Properties panel.
Spans are used for smaller changes to a property, fewer properties, or for individual paragraphs within a <div> tag:
<div id="maincontent">
<span class="mybold">This would be bolder text, perhaps. </span>
<span class="mytext">Use SPANS for changes within a DIV.</span>
</div>
Note that the <p> tags have been replaced by the <span> tags.
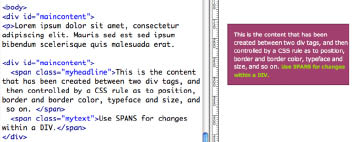
Create a <span> tag to offset parts of content within a <div> tag.
Short of writing this from scratch using the Code panel (which can sometimes be a lot easier), how would you put it together using Dreamweaver's panels?
Assuming you have content placed in your file already, select the portion that you want to enclose in a DIV. Then use the Insert panel and choose Insert > Div Tag.
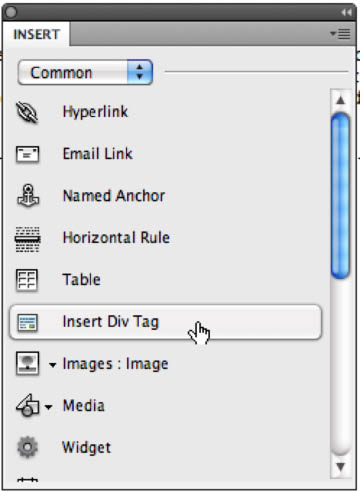
First select the portion of the content you want to set apart using a DIV tag, then select Insert Div Tag from the Insert panel.
In the dialog box that pops up, you can select one of three options. "Wrap around selection" is probably the easiest to remember, especially if you have already selected something.
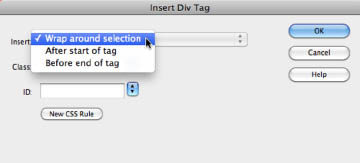
The Insert Div Tag dialog box lets you choose where to place it, and which Class or ID to assign to it. If you have something selected, choose "Wrap around selection."
The next step is to choose either a <class> or <id> to assign to the <div>.
If you have some classes and <div>s defined, you will be able to select them from the Class or ID popup options in the Insert Div Tag panel. If you haven't defined any, or want to format the <div> differently, click the New CSS Rule button. This launches the CSS dialog box where you can go to town using the various categories available to format content.
Remember than an ID can only be applied to one element, and a Class can be applied to multiple elements in an HTML file.
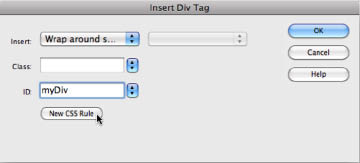
Click the New CSS Rule option to define a specific set of parameters for the selected area.
A <span> is not something you insert using the Insert panel. It's something that Dreamweaver adds to the code whenever you apply a Class to selected text or images.
First, create the Class rule that you want to use. Then select the element(s) you want to affect with that rule. Use the Properties pane to assign it.
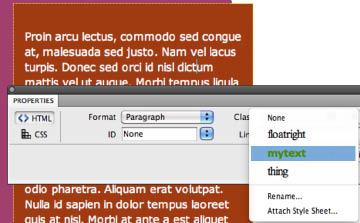
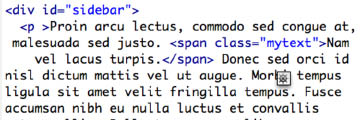
A span tag is used to assign a class to a specific portion of the HTML content, and can be used more than once. Select the area you want to affect, and then choose the appropriate rule from the Class popup menu in the Properties panel.
Cascading Style Sheets are so called because the order of how Tags, Classes, and IDs are interpreted and displayed depends on the hierarchy of the styles.
Any style that is more specific will take precedence over anything that is more generic, thus the styles "cascade" down from those that are broadly defined, to those that are more explicit. An element will adopt the properties defined in an external CSS style sheet first.
If you define the same selector (Tag, ID, Class) within an HTML document and it is a bit different from those in the external CSS file, those that are not defined in the document will use the external style sheet, and any differences in the document styles will take precedence over the external styles.
For instance, in an external CSS file, the <p> tag is defined as:
p {
font-family: Verdana, Arial, Helvetica, sans-serif;
font-size: 11px;
line-height: 13px;
color:#F03
}
When that file is linked to an HTML document, all the text will be in a sans serif typeface, 11 points in size with 2 points of line spacing, and red in color.
Assume that inside the HTML document, we define the <p> tag like so:
p {
font: normal "Palatino Linotype", "Book Antiqua", Palatino, serif;
}
Because the font-family has been redefined within a specific file, it will now display as a serif typeface, rather than a sans serif typeface.
The point size and leading will remain at 11/13 and red, as defined in the external CSS file, since those properties haven't been overridden by the internal style.

Above left: the font styles in the external style sheet are specifying a sans serif typeface in a specific size and color. Above right: the internal style for a serif typeface is overriding the external style and leaving the rest alone.
There is a third kind of CSS rule called an "inline" style. These are applied whenever you use the Properties panel to set the properties of a selected element. Inline styles are NOT best practice, even if they seem a lot easier to apply. Dreamweaver CS4 and CS5 have significantly changed options in the Properties pane to discourage the use of most inline styles. There are a couple, however, that are still appropriate.
The <strong> tag will make selected words bold, and if it was applied by selecting the words and then choosing the Bold option in the Properties pane, Dreamweaver applies it as an inline style.
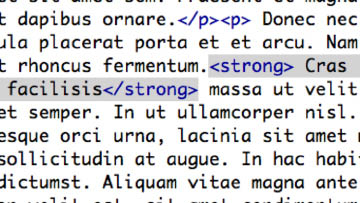
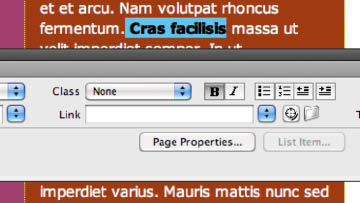
Inline styles are applied by hand, by writing the code in the code panel, or by selecting from limited options in the Properties panel (bottom).


Use the HTML portion of the Properties pane to assign inline styles and classes, and the CSS portion to assign or create rules. Both versions allow you to define page properties (also available under the Modify menu).
Italicized type is created using <em> tags.
The properties panel is a great way to add a new CSS rule to a style sheet: select the CSS portion and select the <New CSS Rule> option in the Targeted Rule popup menu.
It also allows you to edit an existing rule: select the rule from the Targeted Rule popup menu, then click the "Edit Rule" button.
If you change the font, size color, or alignment using this pane, the New CSS Rule dialog box will pop up, prompting you to create a new rule to define the changes you want to make. Nice.
If you want to change the look of the page itself, select Page Properties. The options you select here are written as a <body> style.
Or, be brave, and redefine the <body> tag yourself!
The HTML portion of the Properties panel is where you might apply an inline style, like bold or italic, or to add a Class to it. It also lets you specify selected text as a list (which you can also do using the Format menu), or to format a paragraph in terms of its left margin (outdent will position it toward the left margin, while "indent" will bump the selected paragraph in to the right by applying a <blockquote> tag. You can indent something multiple times. Use the outdent option to bump it back to the left margin again.
The HTML portion of the Properties panel is also where you can add a link to a selected word(s) or image.
There is a lot more to learn about CSS, and exploring on your own is a great way to discover some of it's capabilities. Check out these resources:
http://htmldog.com/reference/cssproperties/
http://www.w3.org/Style/Examples/011/firstcss
YOUR TURN
Go to http://lipsum.com to generate some dummy text to use for this exercise. About 3 paragraphs should work.
Open the file from the last "Your Turn" exercise.
Click on the New Rule icon at the bottom of the CSS panel (little pad icon). Set the Selector to ID. Name it #wrapper, and save the rule in the current document.
Click on the Background category and use the Swatches box to select a background color.
Then click on the Box category.
Set the width and height to 900 (we're only adding the height specification to be able to see it, otherwise it would remain a thin box—we'll remove that in a bit).
Uncheck the Same for All option in the Margin section and set the top and bottom margins to 0, and the left and right margins to auto. This will center the wrapper content in the page.
Click OK and check out your page in Design view. Nice!
Create a second ID using the CSS panel and call it #maincontent. Keep it saved in this document.
Set a background color and then use the Box category to give it a width and height. Use 400px for the width, and 700px for the height so you can see the #wrapper <div> and the #maincontent <div> as separate blocks.
Then set the margins to 15px on all sides. This bounces the #maincontent down a bit from the #wrapper and in at the left.
Before exiting the CSS Box category, add a Float Left property, then click OK.
Finally, it's time to create the style for the #pix ID. Create a new CSS rule for an ID with the Selector Name of #pix. Save it in the same document.
Choose a background color to differentiate it from the other two <div> areas.
In the Box category, add a Float Left property.
Add a width and height (I used 400px for both). Add a 15px margin to the top only.
You can click the "Apply" button at the bottom of the pane to preview your settings. Click OK when you're happy with what you have. (Save your file.)
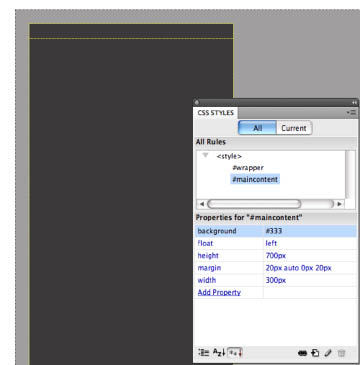
The #wrapper (light gray) and the #maincontent (dark grey)should look like two distinct boxes once you've created the first two CSS rules. The dotted line in the darker box is the #pix <div>.
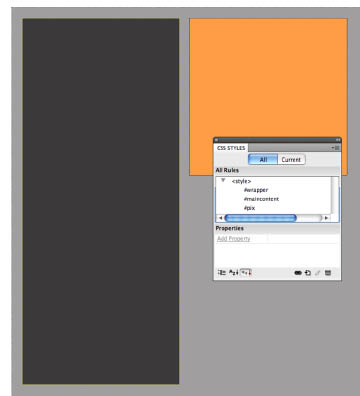
Once you've defined the #pix ID, you should see two separate blocks inside the #wrapper.
Now to fill those rectangles with content.
If you don't have some dummy text in your clipboard, go back to lipsum.com and copy some.
The next step is weird as you can't paste that text in the Design half. So, place your cursor just after the #maincontent opening tag in Code view, hit Return, and then paste (command V).
Click inside the Design half to update the view. Ugh.
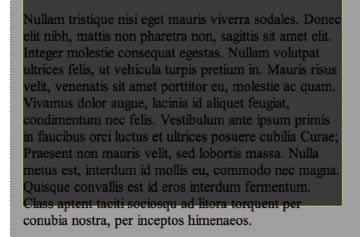
Ewww. Without styling, the #maincontent looks horrible.
Ugly typeface, it extends past the dimensions of the box, and if you chose a dark color, as I did, then you probably can barely see it, if at all. Plus it's slammed right to the edges of the box. Not good.
We need a new rule or two to fix this. Since type is usually controlled by the <p> tag, it would make sense to redefine it.
Create a new rule and select the Tag option for Selector Type. If the <p> tag doesn't automatically show for the Selector Name, just type the letter p in that field (no dot, no #, just p).
In the Type category, chose the typeface, size, color, and line spacing you want. Make sure the color is one that will contrast with the background color of the #maincontent <div>.
Then go to the Box category and use the Padding option to set all sides to 15px. Clicking the Apply button to see what you're getting probably won't change anything yet since the text you pasted hasn't been set as paragraphs.
Click OK.
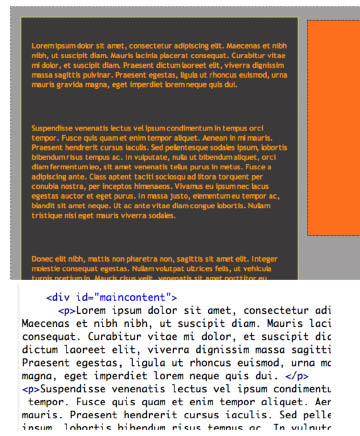
Creating hard returns in Design view adds the necessary <p> tags in code view. And turns the text into something more pleasant to look at and read.
Now, place your cursor before any capital letter in the text and hit the return key to separate it from the rest.
Separate the text block into several separate paragraphs by placing the cursor before a capital letter (or after a period) and hitting return.
Isn't it interesting how just adding hard returns changes the style of the text? If you take a look at the Code view, you should see <p> and </p> tags wherever you hit return.
Take a look at the Properties panel in HTML view and note the option to select how your text is rendered using the Format dropdown menu. You can select text and change it from none to paragraphs or headings here, whenever necessary.
But, the text might be showing outside the #maincontent <div>. That's because we still have a height attribute assigned to it. Highlight the #maincontent style in the CSS panel, then select the Height attribute in the list and then click on the trash can icon at the bottom of the panel. The #maincontent area should expand to include all the text. Much better!
In the Design half of the document, place a hard return after the first sentence in the #maincontent text. Then either select the whole first sentence, or just click somewhere in the sentence.
Select Heading 1 from the Format options in the Properties pane. Ick.
See if you can create a new rule for the <h1> tag to make it work better with the rest of your layout, and then save your file.
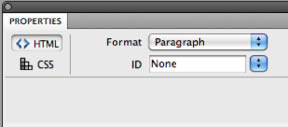
Set selected type to Paragraph or Headings using the Format option in the Properties panel.

Create a new CSS style for the heading 1 tag.
Now add an image to the #pix <div>.
Move your cursor over the #pix section in Design view and click to place an insertion point inside that block.
Open the Insert panel and select the icon that looks like a tree. If you can't see that, then click the down arrow to access the Insert Image option.
Navigate your way to a JPG. GIF, or PNG file and click to select the image you want here. Hopefully, the image is small enough to fit into the space. If not, highlight it and in the Properties panel, select the Edit option (pencil icon, or Photoshop or Fireworks icon) to resize it.
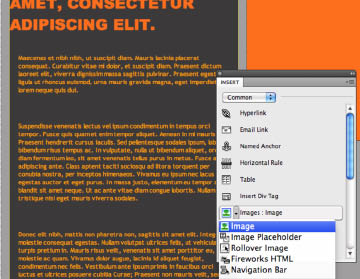
Place your cursor inside the #pix div in Design view, then use the Insert panel or Insert menu to navigate to an image (JPG, GIF, or PNG) to place it in your document.
You don't want to include images that are larger than necessary since that just adds to the load time for no reason. If it's too small and you enlarge it, you're enlarging pixels, which will seriously compromise quality.
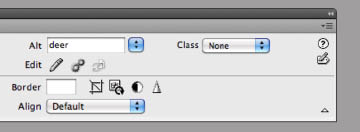
If the image is too large, use the Edit option in the Properties panel to adjust the dimensions. If it's too small, find another image that doesn't require enlarging to ensure good quality.
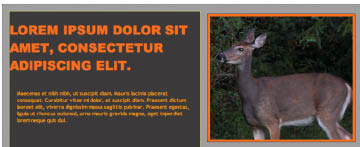
Click inside the #pix <div> and then choose Insert Image from the Insert panel or the Insert menu option. If you had a height property defined, delete it from the #pix rule in the CSS panel.
Don't forget to save your file and upload it to your web space!