WORKING WITH IMAGES
Drawing in Flash can be easy or frustrating, depending on your skills with other image-making programs, like Photoshop and Illustrator. Many of you are already comfortable with what Photoshop can do, and are also skilled with developing images using Illustrator.
To broaden your options, we'll look at ways to incorporate vector-based images created in Illustrator into your Flash projects first, and then take a look at adding photographs to them as well.
ILLUSTRATOR IMAGES
In Illustrator, a symbol is a discrete graphic that can be reused multiple times (open the Symbol panel from the Window menu).
For instance, if you were creating a map of your home state, you would probably need a symbol representing state and local highways, or campsites, or national parks. Rather than draw them over and over, or even group and Option-drag / Alt-drag copies, you can create a symbol of the artwork. This has the same advantage in Illustrator as creating a symbol in Flash; the symbol contains all the vector information, and its use within a document is referred to as an instance of the original. This helps to keep the file size in Illustrator a lot smaller.
Since Adobe purchased Macromedia, the integration of work done in Illustrator being used in Flash has gotten a lot better, especially in terms of symbols.
Try this:
Open Illustrator and create a small vector drawing with the pencil or pen tool; add color, gradients, and any filters or effects you'd like. Then select it, and drag it into the Symbols panel.
Once you've dragged the object that you want to use as a symbol into the Symbols panel, you get to decide whether it should be a graphic or a movie clip, as well as determine the registration point, the same as you do in Flash.
Then, Save the Illustrator file (File > Save) and select Adobe Illustrator (ai) for file type. Feel free to uncheck Create PDF Compatible File, as you don't need that option and it will make your file smaller.
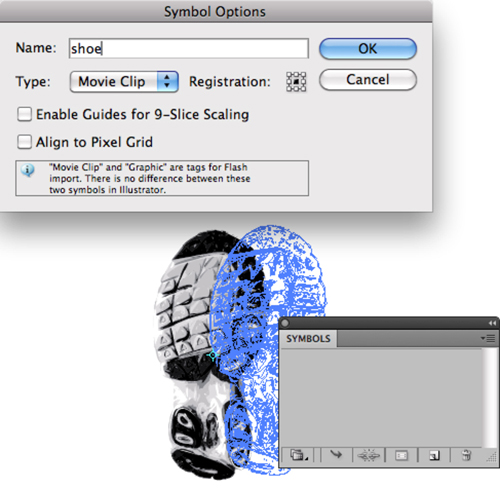
Draw something in Illustrator, and then save it as a movie clip symbol by dragging it to the Symbols panel.
Open a new Flash file (ActionScript 2, for this exercise) and select File > Import > Import to Stage.
Locate and select your saved AI file. Flash will present you with a dialog box and you can decide if you want everything, or only some elements to be imported. You can also determine how some things are treated, for instance, whether text should remain editable or not.
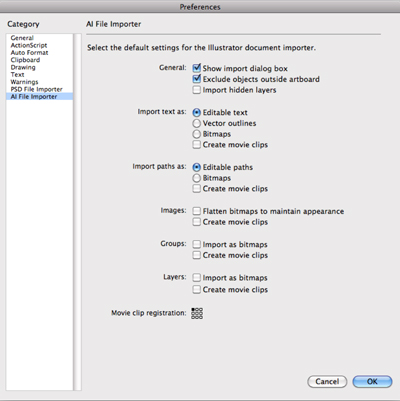
Use Flash > Preferences / Edit > Preferences to open the AI File Importer preferences dialog box to change what and how you import Illustrator files.
If you are just drawing bits and pieces in Illustrator, and don't want to bring in the entire document, it's a simple matter to select what you want in Illustrator, copy it (Command C / Ctrl C) and then flip over to Flash and paste it (Command V / Ctrl V). Remember, though, that when you copy and paste, you will need to make the pasted element(s) into symbols by pressing F8, or dragging the elements into the Library.
You can also create an actual animation in Illustrator and import it into Flash. The trick here is that you need to create a blend in Illustrator between the starting and ending points. I'm not sure I recommend using this technique, but it's nice to know that it can be done.
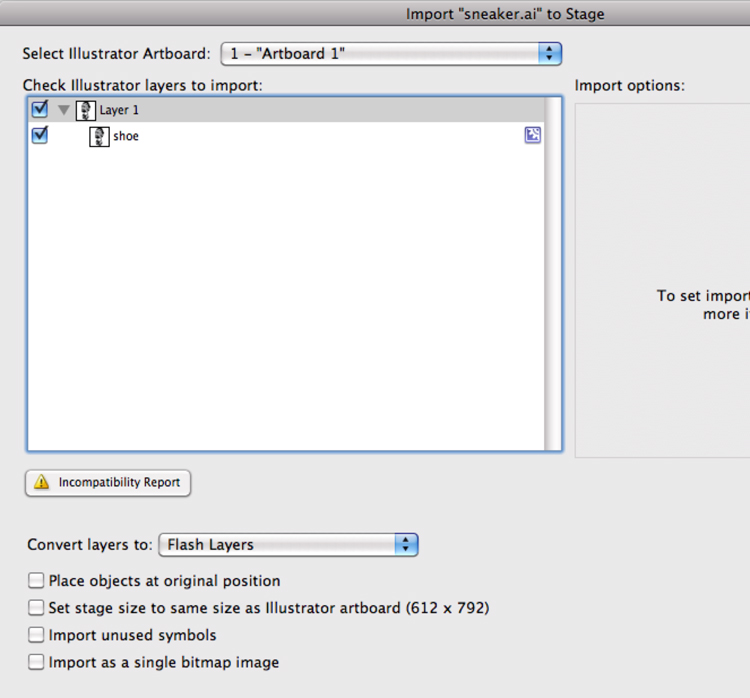
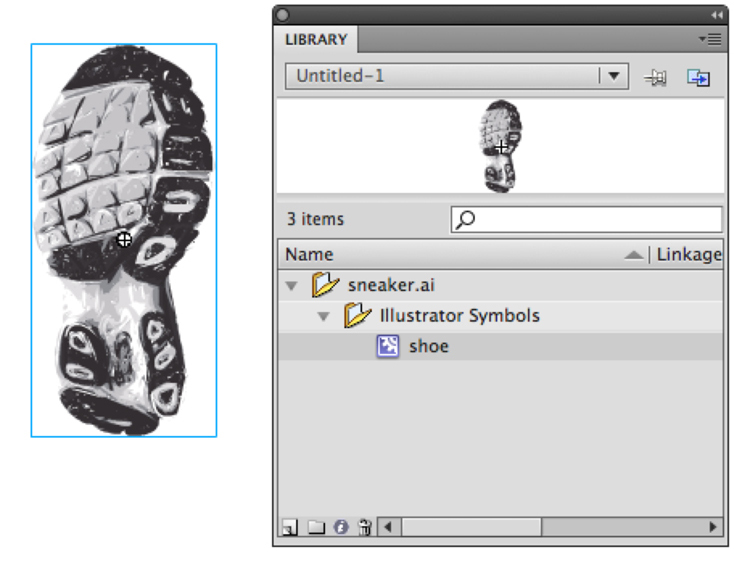
Use File > Import in Flash to open the Illustrator file. Your symbol(s) will be place in the Library so you can use them multiple times in a project.
Use the Flash > Preferences option to set up how Illustrator files will be imported.
OPTIMIZING BITMAPS IN PHOTOSHOP
The only time you should use a bitmap in Flash is if it's a photograph. Truthfully, you can develop some very sophisticated graphics in Flash (or Illustrator) and keep file sizes manageable, so avoid the temptation to design buttons or other graphics in Photoshop. For examples of how elegant vector graphics can be, just open Window > Common Libraries > Buttons and take a look at what can be created directly in Flash.
That said, when you need to use a photo in a Flash project, it is best practice to optimize the image—that is, crop and resize it, and set the appropriate resolution—before hand. That way, the image won't bloat the Flash file with extraneous data.
Optimizing a photo for use in Flash (or the web in general) is easy.
Open the photo in Photoshop. Use the Crop tool to eliminate any portions you do not need first.
Then retouch, and make any color and level corrections required to the portion you've retained.
Use Image > Image Size to change the dimensions of the photo in proportion (never distort a photo!), and adjust the resolution to 72 ppi.
Remember that scaling any photo must be proportional, so if you use the Edit > Transform option, hold the Shift key while dragging a corner point to the desired size.
Do not enlarge a photo, unless you can simultaneously adjust the resolution to a lower number. For instance, if you scanned something at 300 ppi, and it's 4" X 6", you can safely enlarge it to 8" X 10" if you also reduce the ppi to 150. Since any photo you are preparing for Flash will be displayed on the web, the ideal resolution is 72 ppi. Anything higher than that will just waste file space.
Once the image has been cropped, edited, and resized, use File > Save As, or File > Save for Web and Devices, so you don't inadvertently mess up the original (in case you need it again later). You can save your image as a PSD file, or a PNG, or even a JPG file. Do remember that saving as a JPG will compromise the quality a bit, but you will also reduce the FLA size.
If you save the image as a PNG, uncheck the Interlace option as that may cause problems down the road.
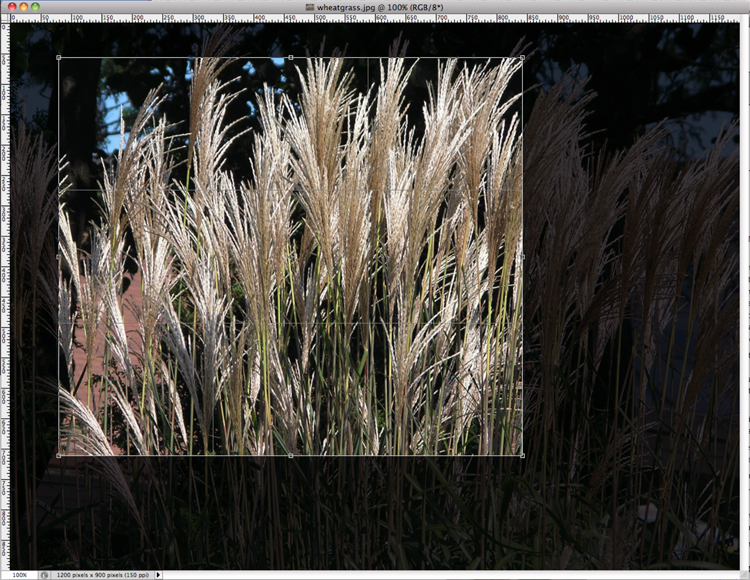
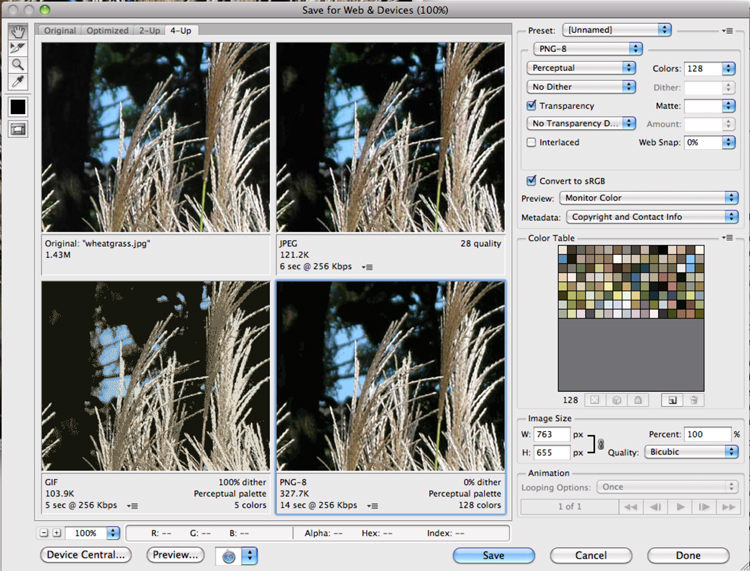
Crop and retouch the image first, adjust the physical dimensions and resolution, then save as a JPG or PNG for a smaller file size.
Crop and retouch the image first, adjust the physical dimensions and resolution, then save as a JPG or PNG for a smaller file size.
OPTIMIZING WITH FIREWORKS
The steps in getting a photo ready to use in Flash using Fireworks are basically the same as they are when using Photoshop:
Crop the image.
Retouch and adjust settings as needed (I love Fireworks, but do my serious retouching in Photoshop).
Use Image Size (deselect everything, and click the Image Size option in the Properties panel) to adjust the dimensions proportionally, and change the resolution to 72 ppi.
Save your file.
You will be saving it as a PNG, unless you change that option in the Save dialog box, since PNG is the native file format for Fireworks files.
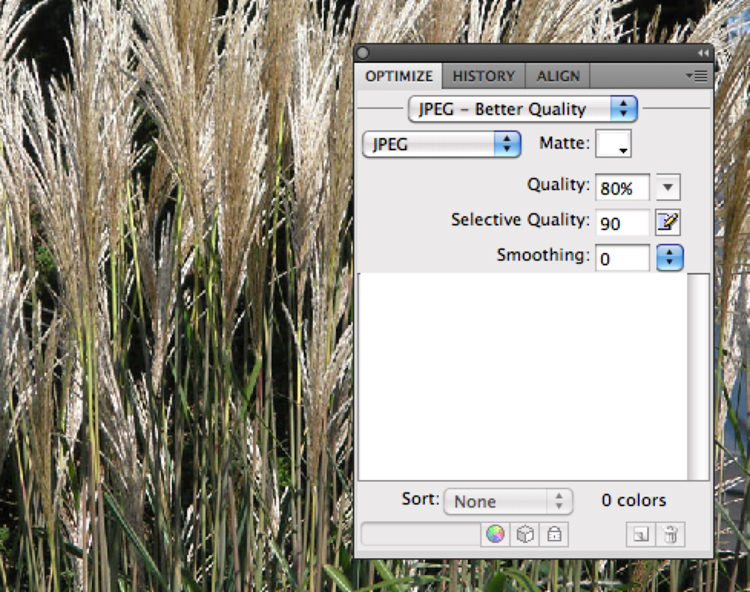
If you want the image as a JPG, use the Optimize panel to set that, then File > Export (Images Only).
You can preview the results using the 2up or 4up options at the top left of your document window. When doing so, check the bottom left of the window to see file size and download time estimates.
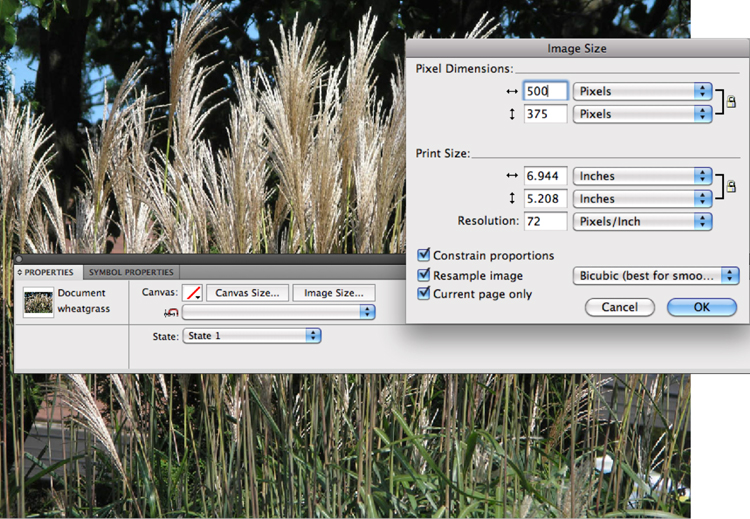
Use the Image Size option in the Properties panel in Fireworks to se the dimensions and resolution for a PNG file.
Use the Optimize panel to set the file format to JPG (or GIF, for graphics) and then select Export from the File menu.
IMPORTING BITMAPS
This is uber-easy. Use File > Import > Import to Stage or Import to Library, and select the image(s) you want to use (you can select several at once; just remember, if they are placed on the stage, to deselect them before doing anything else or you might end up with a symbol that contains multiple photos stacked on top of one another!).
If you are using images that have been numbered sequentially, Flash will ask you if you want to bring them in as a frame by frame animation—that is, it will import all the images in the sequence, and place each one on its own keyframe in the timeline. Generally, that will not be what you want to do.
Once you have photos in the Library (they will be placed there, even if you choose Import to Stage), you can manipulate them in a couple of ways.
First, double-clicking a photo in the Library will open the Bitmap Properties dialog box. Use this to optimize your image further (by selecting JPG compression, for instance, if you've imported a PNG). Note at the bottom of this window the percentage of savings between the imported image, and the SWF (published) file size. Remember to balance file size with quality.
You can also break bitmaps apart (select the image on the stage, then use Modify > Break Apart, Command B / Ctrl B), which turns them into Merge drawings, of a sort. You can erase parts (a background, for instance) with the eraser, and select parts and change color(s) or delete them using the Lasso tool. You can use the Brush, Pen, and Pencil tools to add to the image. When selecting the image with the selection tool, once it's broken apart, it will be selected entirely, and speckled, just as if you were working with a merge-based object.
You cannot delete the original bitmap from the library, even if you do break it apart.

If your images are numbered sequentially, Flash can import them all at once—handy if you want to create an animation using photos!
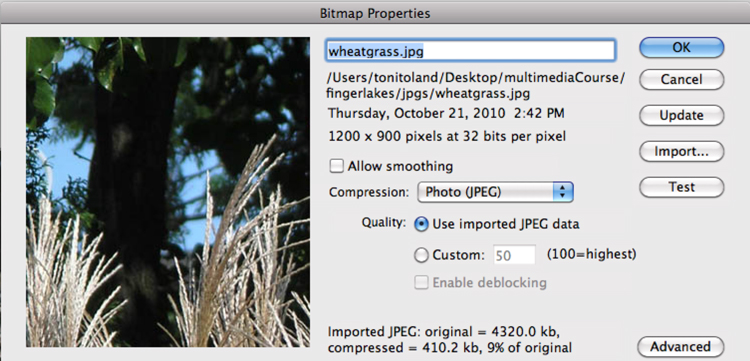
Control-click on the image in the Library to set it's optimization options.
You can trace a bitmap image in Flash, too. It's a lot like the LiveTrace option in Illustrator, although with not nearly the number of choices. Select the photo on the stage and use Modify > Bitmap > Trace. The higher the numbers you use, the less detailed your traced image will be. Smaller numbers preserve the quality better, but take a lot longer to process.
An image that has been traced has actually been turned into a vector-based image, so editing it (deleting the background for instance) is a lot easier; just click the area you want to delete with the Selection tool, and press the delete key. You can't do that with a bitmap that's been broken apart.
Another aspect of using the Trace feature is that, once traced, you can delete the original bitmap from your library, which can potentially save on file size. Again, remember to balance your options between quality and file size.
If you want to animate a bitmap image, you need to make it into a symbol first. You can make a broken apart, or traced image into a symbol, too. Don't get confused about the instance of the photo in the library that looks like a tree—that's the original imported image. To animate it, you need to place an instance of the imported image on the stage, then press F8 to make it a movie clip or graphic symbol. Once it has the blue outline, rather than a gray speckled one, you can transform it over time with a Motion Tween, using the Properties panel, and/or the Free Transform tool to change its appearance.
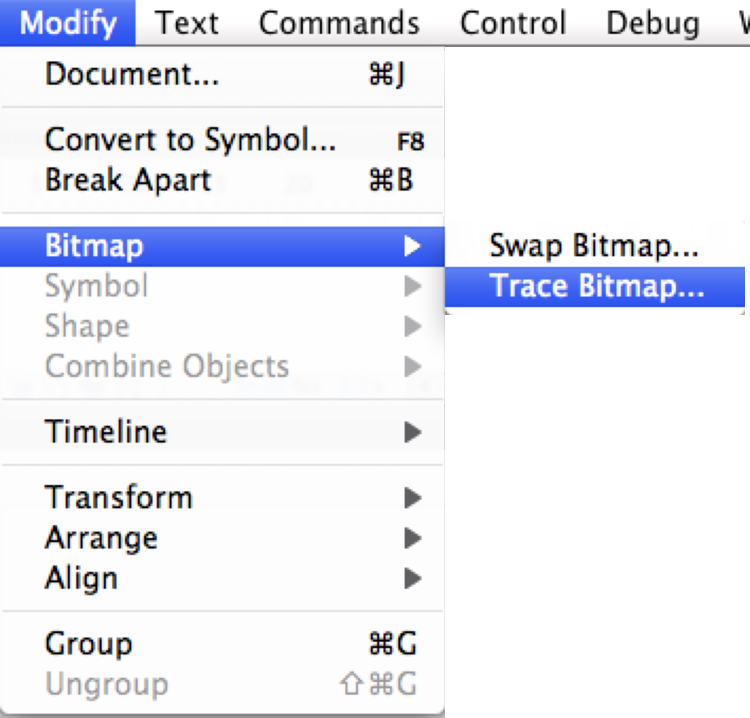
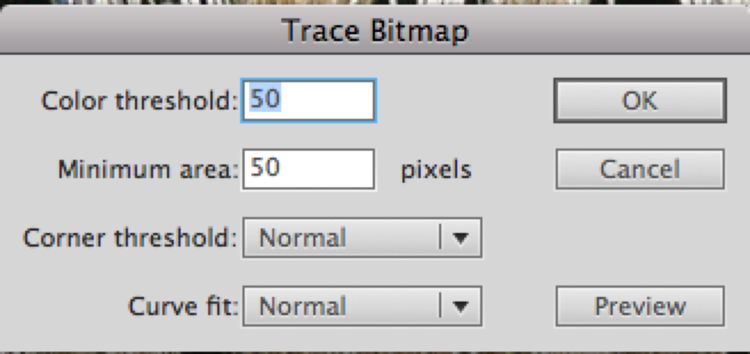
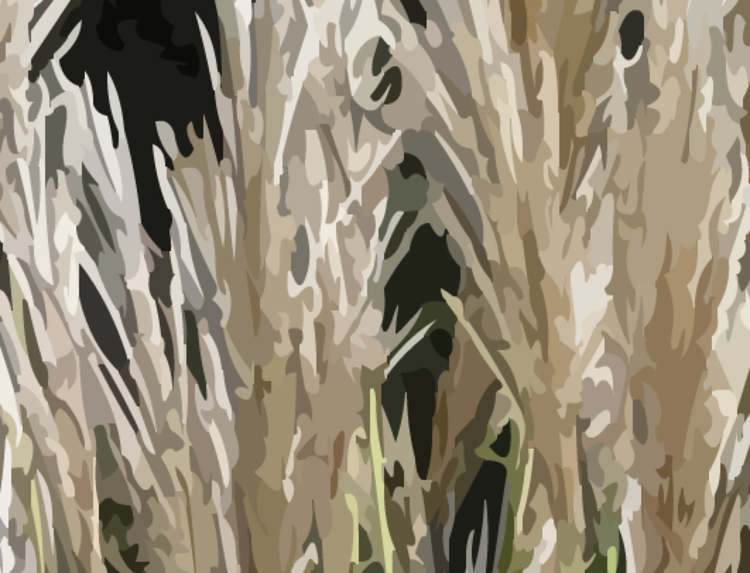
Turn a photo into a more graphic element using the Trace Bitmap option. The higher the numbers used here, the more "posterized" the image will become.
