MASKS
A mask can be any solid shape. If you want it to have "holes" in it—for instance, the crosshairs in a submarine periscope—you'd delete parts from that area.
What's solid is what will become the window, revealing content on the stage. Where there is no solid color, what's on stage will be hidden.
Masks can move, as long as you make the mask shape into a symbol first.
Once you have a mask shape on the first keyframe of its own layer, Control-click / right-click on the layer icon and choose "Mask" from the contextual menu. Note in the illustration on the previous page that the icon representing a mask layer is a small turquoise square next to the layer name, and the layer that's being masked has a turquoise and black checkered icon.
To mask something, add a new layer and drag it below the mask layer. Drag slowly, and wait to see the heavy black line with a circle at the left. This indicates that the layer will be masked, or affected by, the masking layer.
Drag the layer with the content you want to mask underneath the mask layer until you see the layer icon change, and the black line with a circle just above it. The layer to be masked will indent under the masking layer.
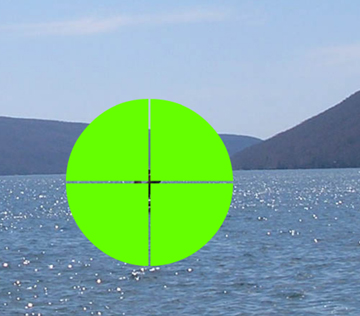
A mask can be any solid shape; if you want a scope sort of look to it, delete some of the solid areas. Steer clear of strokes on anything you want to use as a mask as they can mess things up.
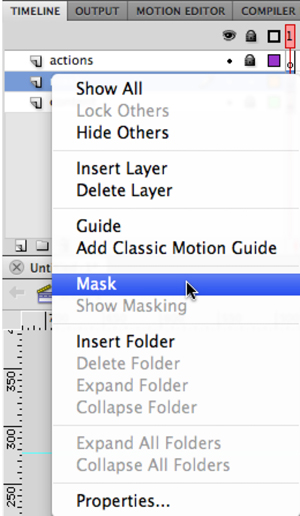
Control-click on the layer you want to use for the mask to set it's property.

Move any layers that you want affected by the mask underneath the mask layer—make sure they are indented and that the layer icon changes.
You can mask multiple layers with the same masking layer; just make sure they are all indented, and that the layer icon is a turquoise and black checkerboard.
There are times when you may want something beneath the masked content, but not affected by the mask. If you haven't set that up ahead of time, fixing it is a snap. Double-click the layer icon to open the Layer Properties dialog box and set the type from Masked to Normal. Voila!
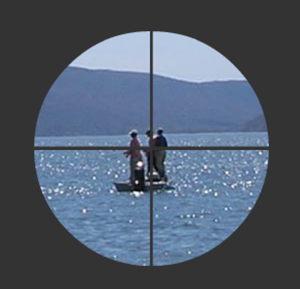
Once the movie is previewed, or you lock both the mask and masked layers, you'll see the actual effect. Set your stage color to something other than white for contrast. A mask shape that's been made into a symbol can be tweened.
ALPHA MASKS
There is another way to make a mask that doesn't require setting the layers to any particular type, but does require naming symbol instances on the stage, and a bit of ActionScript. This technique is particularly interesting since you can create a mask with blurred edges, called an alpha mask.
Here's how it's done:
In an AS2 file, create the mask shape on the stage and fill it with a radial or linear gradient using the Color panel. Set the left and right stops to black, but then set the black stop at the right to an alpha of 0%.
Make the mask shape into a movie clip symbol.
Select the mask shape on the stage and give it an instance name of maskThing in the Properties panel.
While you're in the Properties panel, open the Display category and check the Cache as Bitmap option.
Create a new layer for the background image (it could be anything you draw, or an imported photo) and make sure it's below the layer with the mask on it.
Make the content of the background image into a movie clip symbol (select everything and press F8).
Give the background image an instance name of maskedObject.
While you're in the Properties pane, open the Display category and check the Cache as Bitmap option.
Add a new layer above the mask layer and name it actions (of course, you should name your other two layers as well).
Highlight the first frame of the Actions layer and open the Actions pane. Add this code to the frame (the Actions pane should say ACTIONS-FRAME at the top left):
maskedObject.setMask("maskThing");
Note in this code that we're referring to the two instance names we gave the symbols—maskedObject is the background, and maskThing is the mask shape.
Test your movie (Command Return / Ctrl Enter) and see what happens.
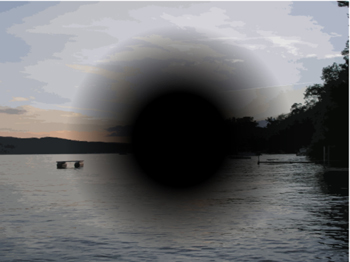
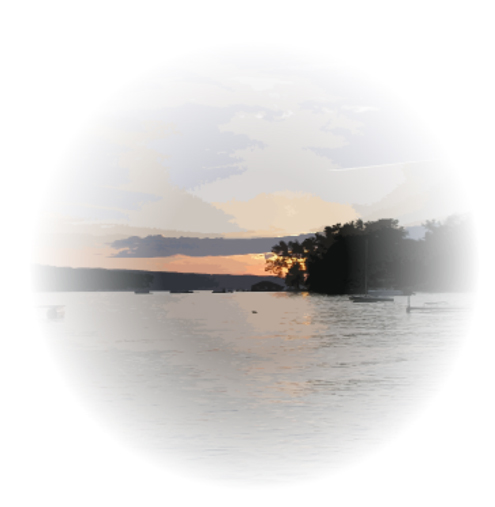
Create a movie clip with a gradient-filled shape to use as a mask.
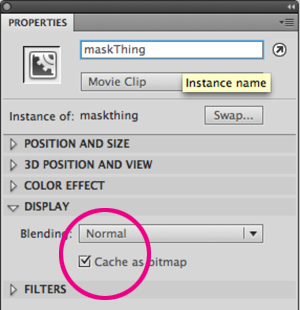
Remember to check the Cache as bitmap option in the Properties panel.
To do the same thing using AS3, create the mask shape on the stage and fill it with a radial or linear gradient using the Color panel. Set the left and right stops to black, but then set the black stop at the right to an alpha of 0%.
Make the mask shape into a movie clip symbol.
Select the mask shape on the stage and give it an instance name of maskThing in the Properties panel.
Create a new layer for the background image (it could be anything you draw, or an imported photo) and make sure it's below the layer with the mask on it.
Make the content of the background image into a movie clip symbol (select everything and press F8).
Give the background image an instance name of maskedObject.
Add a new layer above the mask layer and name it actions (of course, you should name your other two layers as well).
Highlight the first frame of the Actions layer and open the Actions pane. Add this code to the frame (the Actions pane should say ACTIONS-FRAME at the top left):
maskedObject.cacheAsBitmap = true;
maskThing.cacheAsBitmap = true;
maskedObject.mask = maskThing;
There is no need to set anything as a mask or masked layer with this technique, and it works with straight-up solid shapes, too.
ANIMATED MASKS
In the Motion tween model, all tweens are guided, as you can use the Selection tool to modify the path between one property keyframe and another. Using Classic Motion Tweens requires a slightly different method—equally viable, and easy to produce.
Right-click / control-click on the layer you want to mask (the little pad icon) and select "Add Classic Motion Guide." A new layer will be added, and the icon for that layer will change to a dotted arc with a small square at the bottom right. The original layer will be indented beneath it.
Use the pen or pencil tool (not the brush) to draw a curved line for the path. If you want the animation to loop, leave the tiniest space between the beginning of the path and the end.
Add time to the guide layer by pressing F5 in frame 30 or so.
Lock the guide layer, and select the symbol on the layer below. (If this layer is not tucked underneath the guide layer, grab it and gently move it up until it indents under the guide layer.)
In the first keyframe, move the symbol's "pivot point" (the circle in the middle of the symbol) to the beginning of the path; make sure Snap to Objects is turned on, and you should feel it literally snap into place (indent the magnet at the bottom of the toolbar, or use View > Snapping > Snap to Objects).
Add time to your timeline by placing a keyframe (F6) in the same ending frame as the guide layer's.
Select the symbol in the last keyframe and move it so the point snaps to the end of the path.
Add a Classic tween to the symbol layer (Control-click / right-click) and test your movie.
You can make a mask shape move using a motion guide, but it involves one more step.
First, make sure that the symbol that is tucked under the guide layer is the shape you want to use for a mask.
Once you have the shape moving along the guide the way you want it, select all the frames in both the guide layer and the symbol layer.
Control-click / right-click and select Cut Frames.
Create a new movie clip symbol (Command F8 / Ctrl F8) and then Control-click / right-click in the first frame of the new symbol's timeline and select Paste Frames.
NOTE: make sure that the symbol layer is still tucked underneath the guide layer. If it isn't, just gently move it up so it indents.
Back in the main timeline, drag an instance of this new movie clip symbol to a new layer (or one of the empty layers left behind when you cut the frames).
Right-click / control-click on the layer name and select "Mask."
Then indent any layers you want masked underneath this new layer. You can also select and remove all the frames except the first, as the animation is self-contained in the movie clip.
Save and test your movie!
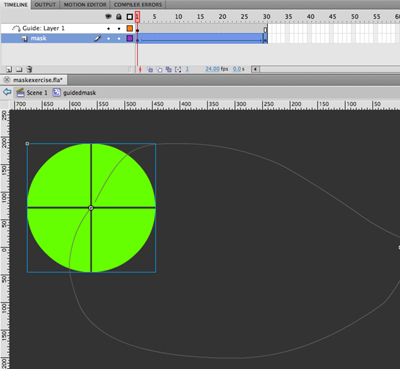
Using a Classic Motion Guide requires a beginning and an ending keyframe. Create a Guide layer above the mask for the path you want the mask to follow. Put this animation inside a movie clip symbol, and then use that symbol on the main timeline on the mask layer.