|
||||||||||||||||||||||||
 |
||||||||||||||||||||||||
 |
||||||||||||||||||||||||
 |
||||||||||||||||||||||||
 |
 |
|||||||||||||||||||||||
|
|||||||||||||||||||||||||||||||||||||||||||||||||||||||||||||||||||||||||||||||||||||||||||||||||||||||||||||||||||||||||||||||||||||||||||||||||||||||||||||||||||||
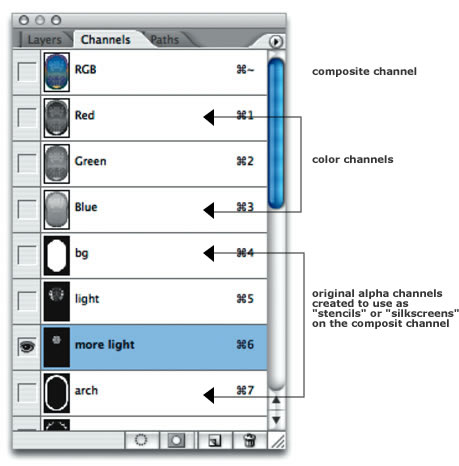
ChannelsChannels are an often underestimate piece of Photoshop. The first four or five channels are established by default. The COMPOSITE channel, or RGB or CMYK channel, is where you create your image. This main channel is composed of all the RGB or CMYK values used in it. Then there are three or four more, corresponding to the color mode of the document - a channel each for the reds, greens and blues used in an RGB document, or channels for the cyan, magenta, yellow, and black. |
|
|||
|
|
||||
|
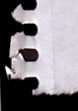
You can select to work on these color channels by highlighting them in the Channels palette and adjusting levels, curves, brightness and contrast, and a host of other options using the Image -> Adjust menu items. In addition, you can create new channels that can be used to influence the main or composite image. These original grayscale channels can be loaded as selections, which are then filled with color or used to erase portions of the main image. You could think of these ALPHA channels as silkscreens or stencils: what's white will be an editable area, shades of gray are editable in degrees, and what's black in the alpha channel will protect areas of the main image.
|
|
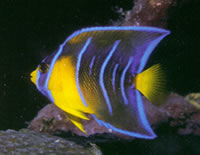
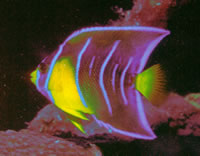
The colors in the bottom image have been altered by adjusting the Curves in the red channel.
|
||
|
To create a channel, you can start by using one of the selection tools to create a selection. From the Select menu, choose "save selection." You can elect to name the new channel or not. If you don't name it, Photohshop names it for you in numerical sequence - Alpha 1, Alpha 2, and so on. To use this channel, you would "load" usingSelect -> Load Selection and then selecting this channel. Dancing ants will appear around the edges between the black and white areas to show you where the active and protected areas are; what's white here will become editable areas in your main channel, and what's black are areas that are protected. |
|
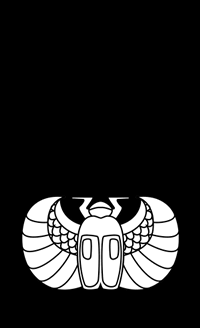
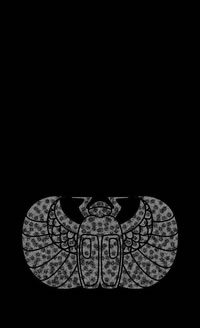
This is a channel created by selecting the parts of the scarab using the magic wand tool within the main image. It was saved using Select -> Save selection and can now be used to paint parts of the main or composite image by choosing Select -> Load selection. The black areas will be protected, while the white areas can be modified. |
||
|
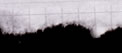
By the same token, you can create a new channel by clicking on the "new channel" icon at the bottom of the palette and paint (in grayscale) directly in the channel to create textures and/or gradients that can then be used to influence your main image. |
|
|
||
|
This alpha channel has a grayscale texture added to it; when used as a selection, the lighter areas will accept more color, and the darker areas will resist color (right).
|
||||