|
||||||||||||||||||||||||
 |
||||||||||||||||||||||||
 |
||||||||||||||||||||||||
 |
||||||||||||||||||||||||
 |
 |
|||||||||||||||||||||||
|
|||||||||||||||||||||||||||||||||||||||||||||||||||||||||||||||||||||||||||||||||||||||||||||||||||||||||||||||||||||||||||||||||||||||||||||||||||||||||||||||||||||
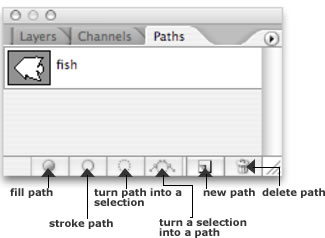
PATHSPaths in Photoshop are almost identical to the paths you create with the pen tool in Illustrator. They are vector shapes that can be used to create strokes or fills, to mask llayers, and to silhouette images.
|
|
|
|
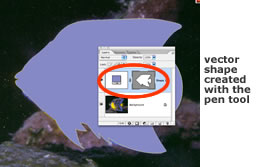
If you select the pen tool and start drawing around a shape in your main image, you will create a vector shape. |
|
|
|
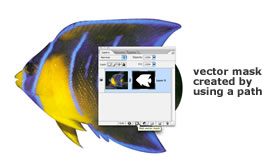
If you create a new path in the Paths palette first, you can use that path to create an outline, a filled object, to create a layer mask that will reveal portions of your image without damaging the image, or a selection. Paths do not increase file size to the same degree as adding channels does, so if you need to just create a simple shape, doing that using a path is smarter than doing it as a channel. Select a path to use by highlighting it in the Paths palette.
|
|
|
|
The pen tool works the same way in Photoshop as it does in Illustrator; click to place corner points, click and drag to create curve points, and use the Option key to break curve handles.
|
||