BUTTONS
Buttons are a cinch to make in Fireworks. You can create individual buttons to assemble in a Dreamweaver document, or create a navigation bar that you put on each page of your site. A nav bar is a great way to create a consistent look throughout a site.
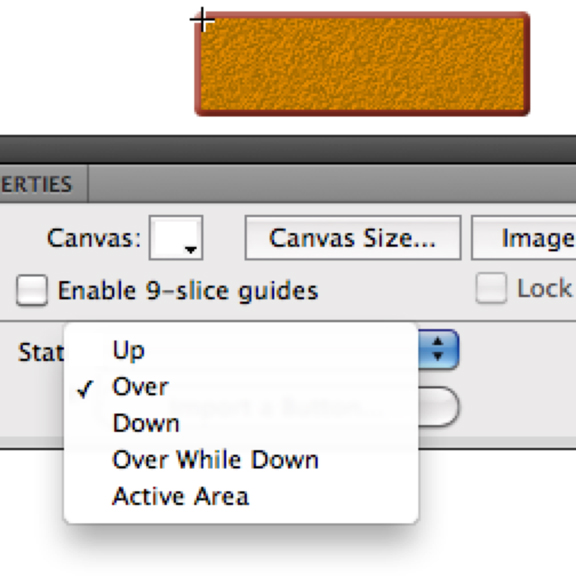
There are four (or five) states to a button: what it looks like normally (UP state), what it looks like when a mouse moves over it (OVER state), what it looks like while it's being clicked (DOWN state), and where the mouse has to be in order for the button function to kick in (ACTIVE area). There is another state called "over while down" that determines what your button looks like when it's down—after it's been pressed—as it's moused over.

Begin by choosing Insert > New Button from the Edit menu or click on the “new symbol” icon at the bottom of the Library panel.
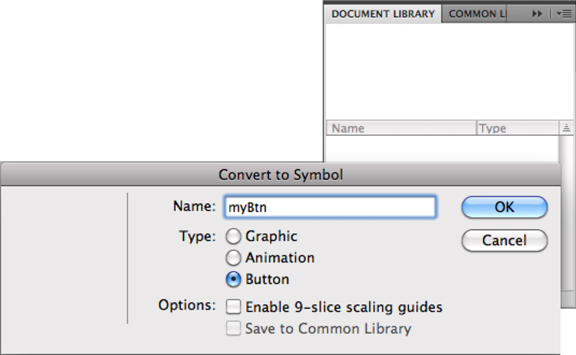
Or, if you've already created something on the canvase, select it and use Modify > Symbol > Convert to Symbol (F8). Remember to give it a name and to select Button for type.
Use any of the drawing tools to create your button. Don't forget to mess with strokes, fills, and filters! If you want to add text, go ahead. If you're creating a nav bar and you want different text for each button, add the text for the first button in all the states.
When you're finished with the UP state, use the popup menu in the Properties panel to switch to the Over state.
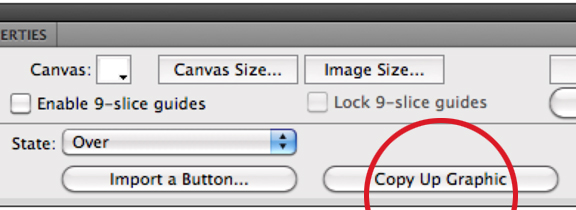
To the right of the States option, is a button that says "copy up graphic." If you want the over state of the button to be identical to the up state, click on this. If you are going to make minor changes, say, to the color or add a drop shadow or something minor, select this option as well.
This copies the image from the up state into the over state, Make any changes you might want - it's a good idea to change something so your audience knows it's interactive.
If you want something totally different for your over state, draw it using any of the drawing tools, strokes, fills and effects.
Then, select the Down option from the properties panel.
NOTE: If you aren't seeing the State menu in the Properties panel, make sure everything is deselected.
Again, you can select "copy over graphic" to copy what's on the over state onto the down state. Make any changes you want using the stroke, fill, and effects palette.
If you want the down state to look like the up state for some reason, reselect the up option from the State menu in the Properties panel, select the button and copy it. Then flip back to the down state and paste it. It will paste in the exact same position as on the up state.
The Over While Down state is useful if you're creating a nav bar; this is what your button will look like after it's pressed.
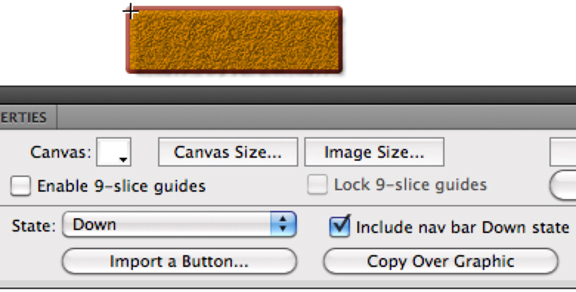 The down state options in the Properties panel offers the option to include the down stat in a nav bar—this
Finally, the active area, or hit state.
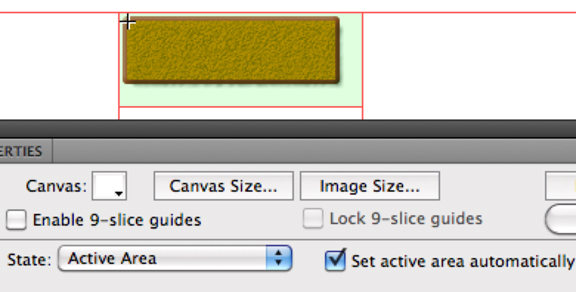 This portion of the button editor is already created for you: a
slice has been placed over the button, and is large enough to cover
the entire button in all its states. If you'd like to adjust the size
of the slice, uncheck "set active area automatically" to make the changes.
This portion of the button editor is already created for you: a
slice has been placed over the button, and is large enough to cover
the entire button in all its states. If you'd like to adjust the size
of the slice, uncheck "set active area automatically" to make the changes.
You may not have noticed but as soon as you chose to create a symbol, you entered into edit mode. This is similar to isolation mode in Illustrator. To exit, just click the blue arrow at the top left of the document window.

To get back to the canvas, click the blue arrow at the top left of the document window.
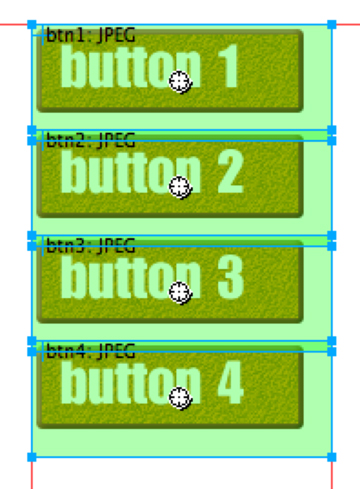 Once you’ve created a button, Fireworks places it in your
document. If you have Show Hotspots & Slices showing, you’ll
see a green overlay and red guide lines surrounding the edges of your
button. You'll also see a registration mark in the center, which is used to create rollovers, disjoint
rollovers, and pop-up menus (more about those in the following sections).
Once you’ve created a button, Fireworks places it in your
document. If you have Show Hotspots & Slices showing, you’ll
see a green overlay and red guide lines surrounding the edges of your
button. You'll also see a registration mark in the center, which is used to create rollovers, disjoint
rollovers, and pop-up menus (more about those in the following sections).
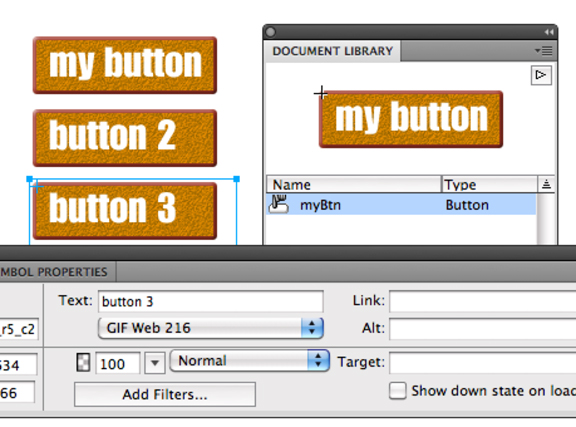
The button symbol will be placed in the library, so you can drag as many instances of it to the canvas as you need. Select each one in turn, and use the Properties panel to change the text on each one (above). Take the time to name your button instance (and all the slices and hotspots in your file) in the Properties panel—you’ll see the name in the upper left corner of the button slice when it's selected.
You can preview how your button works by clicking on the “preview” icon at the top left of the document window, or by choosing “preview in browser” either from the File menu, from the top right of the document window (click and hold the little Fireworks icon), or pressing option + F12.
Edit a button by double clicking its image in the library window, or double clicking it on the canvas.
You’ll also use the properties palette to assign a link to it: type an absolute or relative url. And don’t forget an alt tag. If you don't know how your site structure will be set up at this point, and therefore unable to add the link here, you can do it later in Dreamweaver.
"Target” refers to the window where the new page will load. If you leave it set to "none" the new page will load in the same browser window.
You can choose to have it load in a new window using _blank. This is handy if you don't want people to loose track of your site. The other target choices refer to pages that use frames.

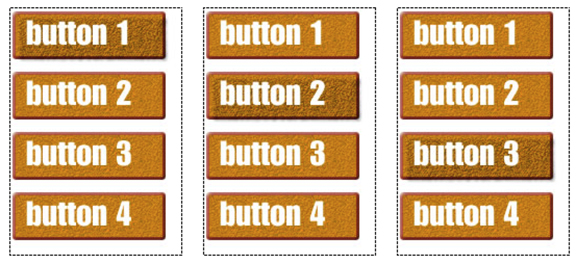
OK. So that's a basic button. What if you want all
your buttons lined up in one document, with links attached to each one?
That's where a nav bar comes in handy.
To create your nav bar, drag the button symbol from the Library to the canvas as many times as you need (or Option + drag to copy it).
Select one and using the Properties panel, delete the text and change it. Name this new button, and add your link and alt information.
Check the "Show Down State on Load" for each button, too—it's at the bottom right of the Properties panel.
Do that for all the other buttons.
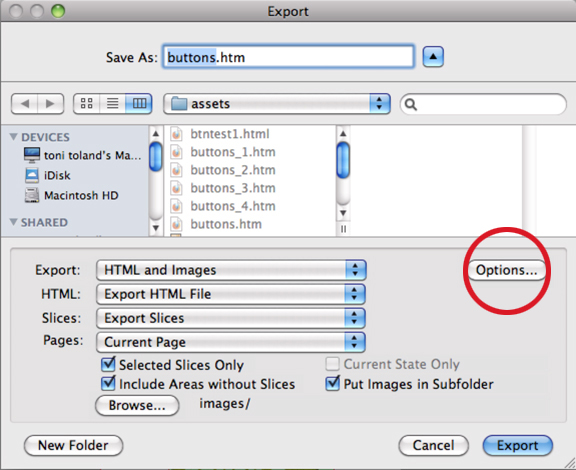
When you're ready to export your nav bar to use in a Dreamweaver file, choose File > Export, and in the Export dialog box, first click the Options button. Select the Document Specific tab and in that pane, select Export multiple nav bar HTML files.
When you export the file, Fireworks will generate a separate HTM file for each nav bar "state." That is, each HTM file will have a different button showing the "over while down" state. That's the file you will use on the page that button links to.
Click the Options button to access the Document Specific settings.
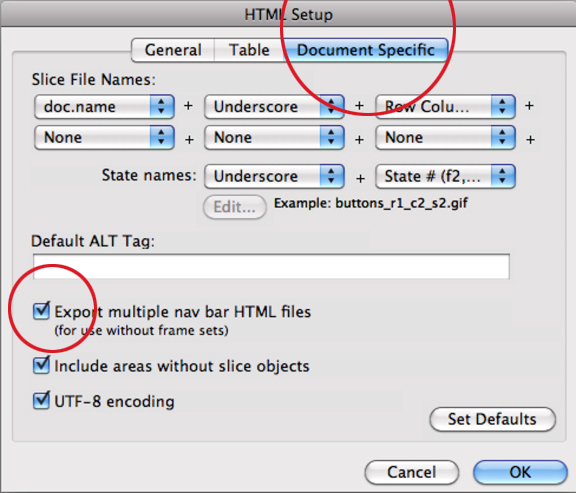 Select Export multiple nav bar HTML files (left).
Click OK to exit back to the Export dialog box and be sure to check the options there.
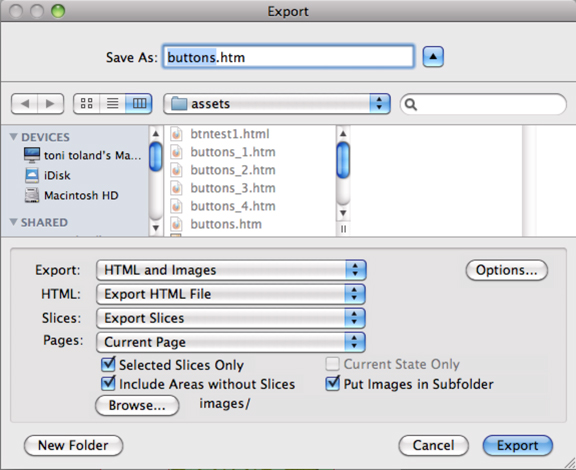 First, note that Fireworks has named your file using the file name, and an extension of HTM. This is an HTML file that will "reassemble" the slices for you buttons back into a table that you import into Dreamweaver.
Below, make sure you are Exporting HTML and Images from the popup menu, the HTML file the slices, and the current page (we'll get into pages in another lecture).
Below those options are a few others that are equally important. UNcheck
"Selected Slices Only" when you're exporting a nav bar for the first time. You want everything to export. You can include areas without slices. The most important piece here is to make sure you select Put Images in Subfolder. If you don't you're folder will be a mess. You don't need to access the images—just the HTM file, so you might as well tuck them away neatly.
Click Export.
 To place this file in a Dreamweaver project, just open the HTML file you want to change, or create a new one. Use the Import panel or menu item and from the Image options select the Fireworks HTML file (not the images).
If you exported the file using the nav bar option, you will get multiple HTM files. Use each on on the page for which it was created.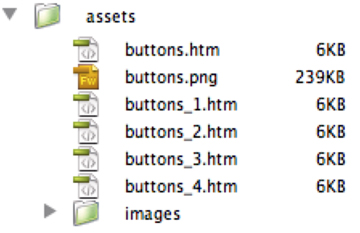
Note the number of HTM files Fireworks created (left). Use each one on its corresponding page. The button for the page will be in the down state and an inactive link (below).