TOOLS
Use the properties panel to change the way a tool works when you use it.
selection tools
 Selection tool: this selects paths and objects. Behind it you will
find the "select behind" arrow, which allows you to select
something behind a slice, for instance. You could also click on the
sub-layer of the object you want to select in the layers panel. Behind the selection tool is the Select Behind tool, if you need to get at something that's covered by another object. Easier is to just highlight the layer or sublayer you need using the Layers panel.
 Subselection tool: use this to adjust paths, as you would in Illustrator
or Photoshop.
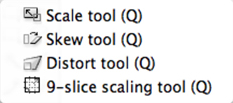 Scale/Rotate/Skew/Distort tool: select something and then click
with one of these tools to create a center point for the object and
eight control points. Use the top or bottom points to enlarge or reduce
vertically, and the left and right points to change the horizontal
dimensions. The corner points can be used to scale an object in proportion
(you don’t have to hold the shift key).
The skew tool moves two corner points at a time to create a perspective distortion, or by using the side control points, angles (skews) something.
The distort tool allows you to move one corner or edge point at a time.
The 9-slice scaling tool is used to scale certain parts of a selected object without distorting the edges or frame.
All four tools allow you to rotate an object when you move the cursor a bit away from a corner point. The object rotates around its center point. Move the center point to change the point of rotation.
 Crop tool: click and drag around the area you want to preserve,
then click enter or return to crop your canvas.
Underneath the crop tool is the export area tool. Surround the area you want to export and click enter or return. The Export Preview window opens and allows you to specify your export preferences and export the file. This doesn’t crop your original image.
BITMAP TOOLS
These tools allow you to paint and draw much the same way you would in Photoshop.
 Rectangular/Ellipse Selection tool: use these tools to select portions
of a bitmapped layer. (To select objects on a vector layer, use the arrow
selection tool.)
 Lasso Selection tool: this tool is for selecting freeform shapes within
a bitmap layer. Click and drag around the area you want to select. Behind
it is the polygonal selection tool: click and click to place control
points with straight edges between them.
 Magic Wand tool: this tool selects contiguous pixels in a bitmap. You
can use the Select menu to select similar colors, expand, contract, outline,
or smooth your selection. You can also save your selection from the Select
menu. You can only save one selection at a time.
Use the properties palette to set your tolerance.
 Paint Brush tool: uses the current stroke color. Adjust the color,
size and other modifiers using the "stroke" and "effects" palette.
Use the arrow selection tools to enlarge, reduce, and reposition a
bitmapped object.
 Eraser tool: erase bitmapped areas of your document with this tool.
Use the properties panel to change the density—100 erases something
completely, and 0 won’t erase anything. Use the properties panel
to change the shape and size of the eraser as well.
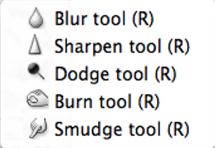 Blur/Sharpen/Dodge/Burn/Smudge tools: these work much as they do in
Photoshop, though if you smudge something long enough it will disappear.
 Rubber Stamp/Replace Color/Red-Eye Removal tools: use the rubber
stamp to select then paint a copy of something; hold the option key
to determine the area you want to clone.
Replace color allows you to specify a color in your document (using the properties panel) and then paint with a new color: use the “colorize” check box to totally cover the original color, or uncheck it to tint it. The higher the tolerance you set, the more of the specified color you effect.
Use the red-eye removal tool to fix photos where the camera flash made someone’s eyes red.This is less of a problem with newer digital cameras, although you will almost always get red-eye with animals.
VECTOR TOOLS
 Line tool: click and drag to make straight lines. Hold the shift key
down to create horizontal, vertical, or 45 degree lines.
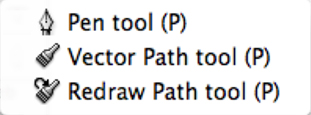 Pen/Vector Path/Redraw Path tools: use the pen tool to create vector
based paths with control points; it works like the pen tool in Illustrator
and Photoshop (use the hollow arrow and option key to change the direction
of a curve point’s handles when you’re done drawn, or the
command and option key to edit it while still using the pen tool).
The vector path tool creates a vector path with paintbrush-like qualities.
Use the redraw vector path tool to make adjustments to a vector path—it’s weird though.
Alter any of these paths using the subselection (hollow arrow) tool.
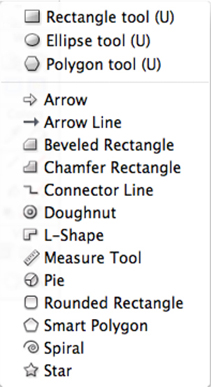 Rectangle tool: use this to create rectangles and squares. Behind
it you will find tools to make circles, and polygons. Use the properties
palette to specify the number of sides for your polygon, and whether
you want a polygon or a star shape. You can also specify the degree
of rounded corners for rectangles here.
Underneath these are a series of autoshape tools that create arrows, rounded cornered rectangles, stars, spirals, and more. These shapes, when selected with the arrow tool, display diamond shaped control points that allow you to edit the shape. There are additional autoshapes available from the autoshape panel (under the Window menu).
 Text tool: select this and click, or click and drag to create a bounding
box, where you want the type to appear. Use the properties panel to change
character and paragraph specifications.
 Freeform tools: these tools don’t draw per se; they distort
vector paths. Use them to push, pull, and smudge lines created with
the pen tool or the vector path tool.
Knife tool: use this on vector shapes to slice them into bits. You need to click and drag across the edge of an object to cut it, rather than click on the edge, as you would with the scissors tool in Illustrator. Use the subselection tool to move sliced objects/points apart.
WEB TOOLS
Use these tools to create hotspots (for links) and slices (for rollovers and links).
 Hotspot tools: use these to create hotspots over areas of your image.
A hotspot is used to create a link to a URL. Behind the rectangle hotspot
tool, you will find the circular and polygonal hotspot tools. The polygonal
hotspot too is used for irregularly shaped hot spots—click and
click to create the shape (same as using the polygonal lasso).
 Slice tools: slices can be used to cut up your image into several
small files so the image loads faster in one's browser. They can also
be used to create links and roll over images. Behind the rectangular
slice too is the polygonal slice tool for irregular shapes. You can’t
create circular slices.
 Hide Hotspots & Slices: does what it says...
 Show Hotspots & Slices: does what it says :-)
COLORS
 Eyedropper: As in Photoshop, use this to select colors from other objects, or from within a bitmapped image.
 Fill tools: Use the paintbucket to fill a closed shape, and the gradient tool to fill with a gradient.
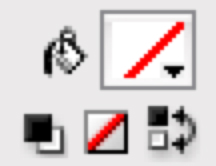 Stroke Color: click and drag to the color you want for the edges of
your selected (or next-to-be-drawn) object.
Fill color: click and drag to the color you want for the fill of selected objects—or the object you are about to draw.
Underneath the stroke and fill icons are three smaller icons. The first resets the stroke and fill to black and white (or whatever you may have set your default colors to be in Preferences). The middle one sets the fill or stroke to none (depending on whether the pencil or the paint bucket is active). The right icon switches the stroke and fill colors.
VIEW TOOLS
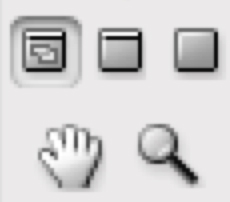 Use the left icon to work in a “normal” view. The middle
icon expands your document window to the full width and height of your
monitor. The right icon disappears your menus and puts your document
on a black background.
Hand tool: this allows you to scroll to different portions of your image if it’s too big to fit in the current window. Use your space bar to do the same thing. Much quicker! Double click the hand tool to get a fit in window view (or type command 0).
Zoom tool: use this tool to get closer to a portion of your image for fine tuning. Hold the option key to zoom out. Or better yet, use space bar command to zoom in, (or command +) and space bar option command to zoom out (or command -). Double click the zoom tool to view your canvas at 100% (or type command 1)