SAVING + EXPORTING
Saving a Fireworks file and exporting it are two different things.
The default file format for Fireworks documents is PNG. PNG (Portable Network Graphic) files can be opened in either Photoshop or Fireworks. When putting together a web site, it's a good idea to create a folder for all your Fireworks documents. You will use them to make changes and corrections. It's been a while coming, but most browsers support PNG images, so you can use them, along with JPG and GIF in any HTML page. They are generally a bit larger in file size, but if you need transparency and continuous tone, PNG is the only format that will work.
When you have something you like and are finished, you can export the file in order for it to be available to use in Dreamweaver. Exporting allows you to optimize it by choosing a file format that's compatible with the web.
 The most important thing is how it will look—you can preview
the file by checking the Preview option at the top of the document
window. At the bottom left of the document window is an estimate of
how long it will take a browser to load the image with a 56.6 bps internet
connection (which is very very slow).
Determining which format to choose is relatively simple in Fireworks. If you aren't sure whether you want a GIF, a JPG, or a PNG, you can use the Export Wizard feature under the File menu.
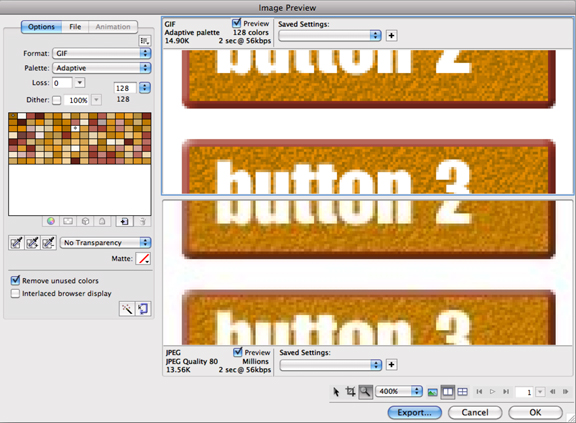
After answering the questions in several dialog boxes (like a required file size, and where the image will be used) you are brought to the Image Preview dialog box.
 If you’re exporting a file with frames (covered in another lecture), the export wizard asks
you different questions.
When you click “exit,” the export preview dialog box opens.
There are lots of choices to make here, but if you got here using the Export Wizard, the optimum format options are already selected for you.
At the bottom of the right panel there are several tools that allow you to view different parts of the file, crop it, and zoom in and out. Determine how many versions you want to see in the field to the right of these tools. Choose a different file format for each one so you can compare the quality and size.
Once you’ve decided how you want it exported, move to the top left side of the panel and make your choice from the Format popup menu. Then click Export or press Return or Enter.
NOTE: If you've created something you want to bring into Photoshop, you can choose that from the format options, as well as the SWF format for exporting something to use in Flash (although you will loose some features, like stuff created with the effects palettes).
Once the file format has been determined, exit the Image Preview dialog box. You will be presented with the Export dialog box. Or choose Export from the File menu if you used the Optimize panel rather than the Export Wizard.
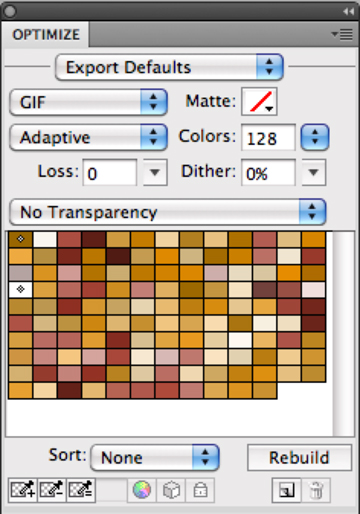 The Optimize panel has some of the same sort of options as Image Preview. Click the Preview option at the top left of the document window, and then choose the different export options in the Optimize panel to analyze and fine tune your file for optimum quality and size.
Files that are just about images and text can be exported as "image only" files. The suffix at the end of the file name reveals it's format (i.e. gif or jpg).
Files that contain more than one frame, slices and/or hotspots should be exported as HTML and Images. This creates the HTML code that's used in Dreamweaver.
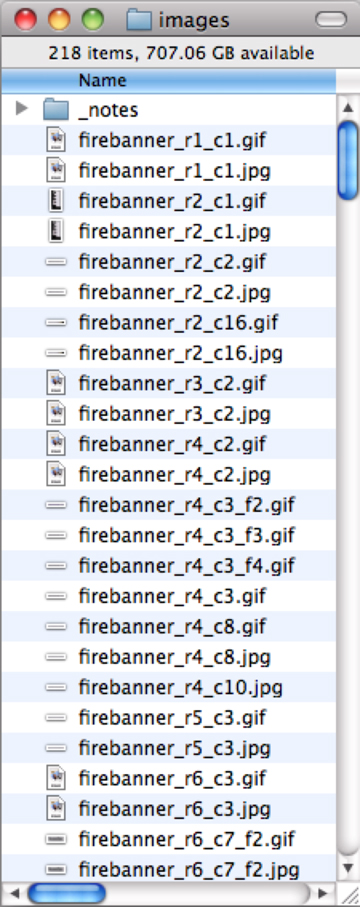 Make sure the slices are saved to a separate folder from the HTM file:
Fireworks creates multiple slices (small pieces of the overall file) for nav bars, rollovers, and buttons.
You don't want to confuse those slices with the actual code that you
will import to Dreamweaver. Therefore, it's 'way smarter to put the
slices in a separate folder so all these small files don't clutter
up your main image folder. It’s also smart to create a separate
folder for different HTM files you create.
When exporting a file with slices, hotspots, and/or frames, put them in a subfolder; as you can see here, there are 218 separate files that make up this banner image.
![]() To bring an plain image into Dreamweaver use the Insert
Image icon—it looks like a tree—in the Insert panel, or from the Insert Menu in Dreamweaver.
To bring an plain image into Dreamweaver use the Insert
Image icon—it looks like a tree—in the Insert panel, or from the Insert Menu in Dreamweaver.
 If you’re bringing in a nav bar or disjoint rollover file you
need to use the Insert Fireworks HTML icon. Click on the triangle to the right of the icon to access these choices, and others.
Navigate your way to the HTM file you exported and select it. This reassembles your slices into a real image using a table, along with importing the code that makes the rollovers work.
(By the way, I'd never check "delete file after insertion" in Dreamweaver just in case you need to modify it at a later date or use it again.)
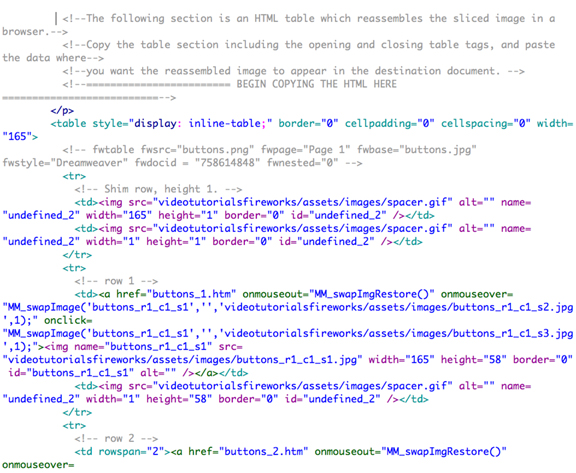
Above: This is just a small portion of the HTML code that Fireworks generates to put together this 4 button nav bar in a Dreamweaver file.